

Looking for a 2 days in Zion National Park? You have come to the right place.
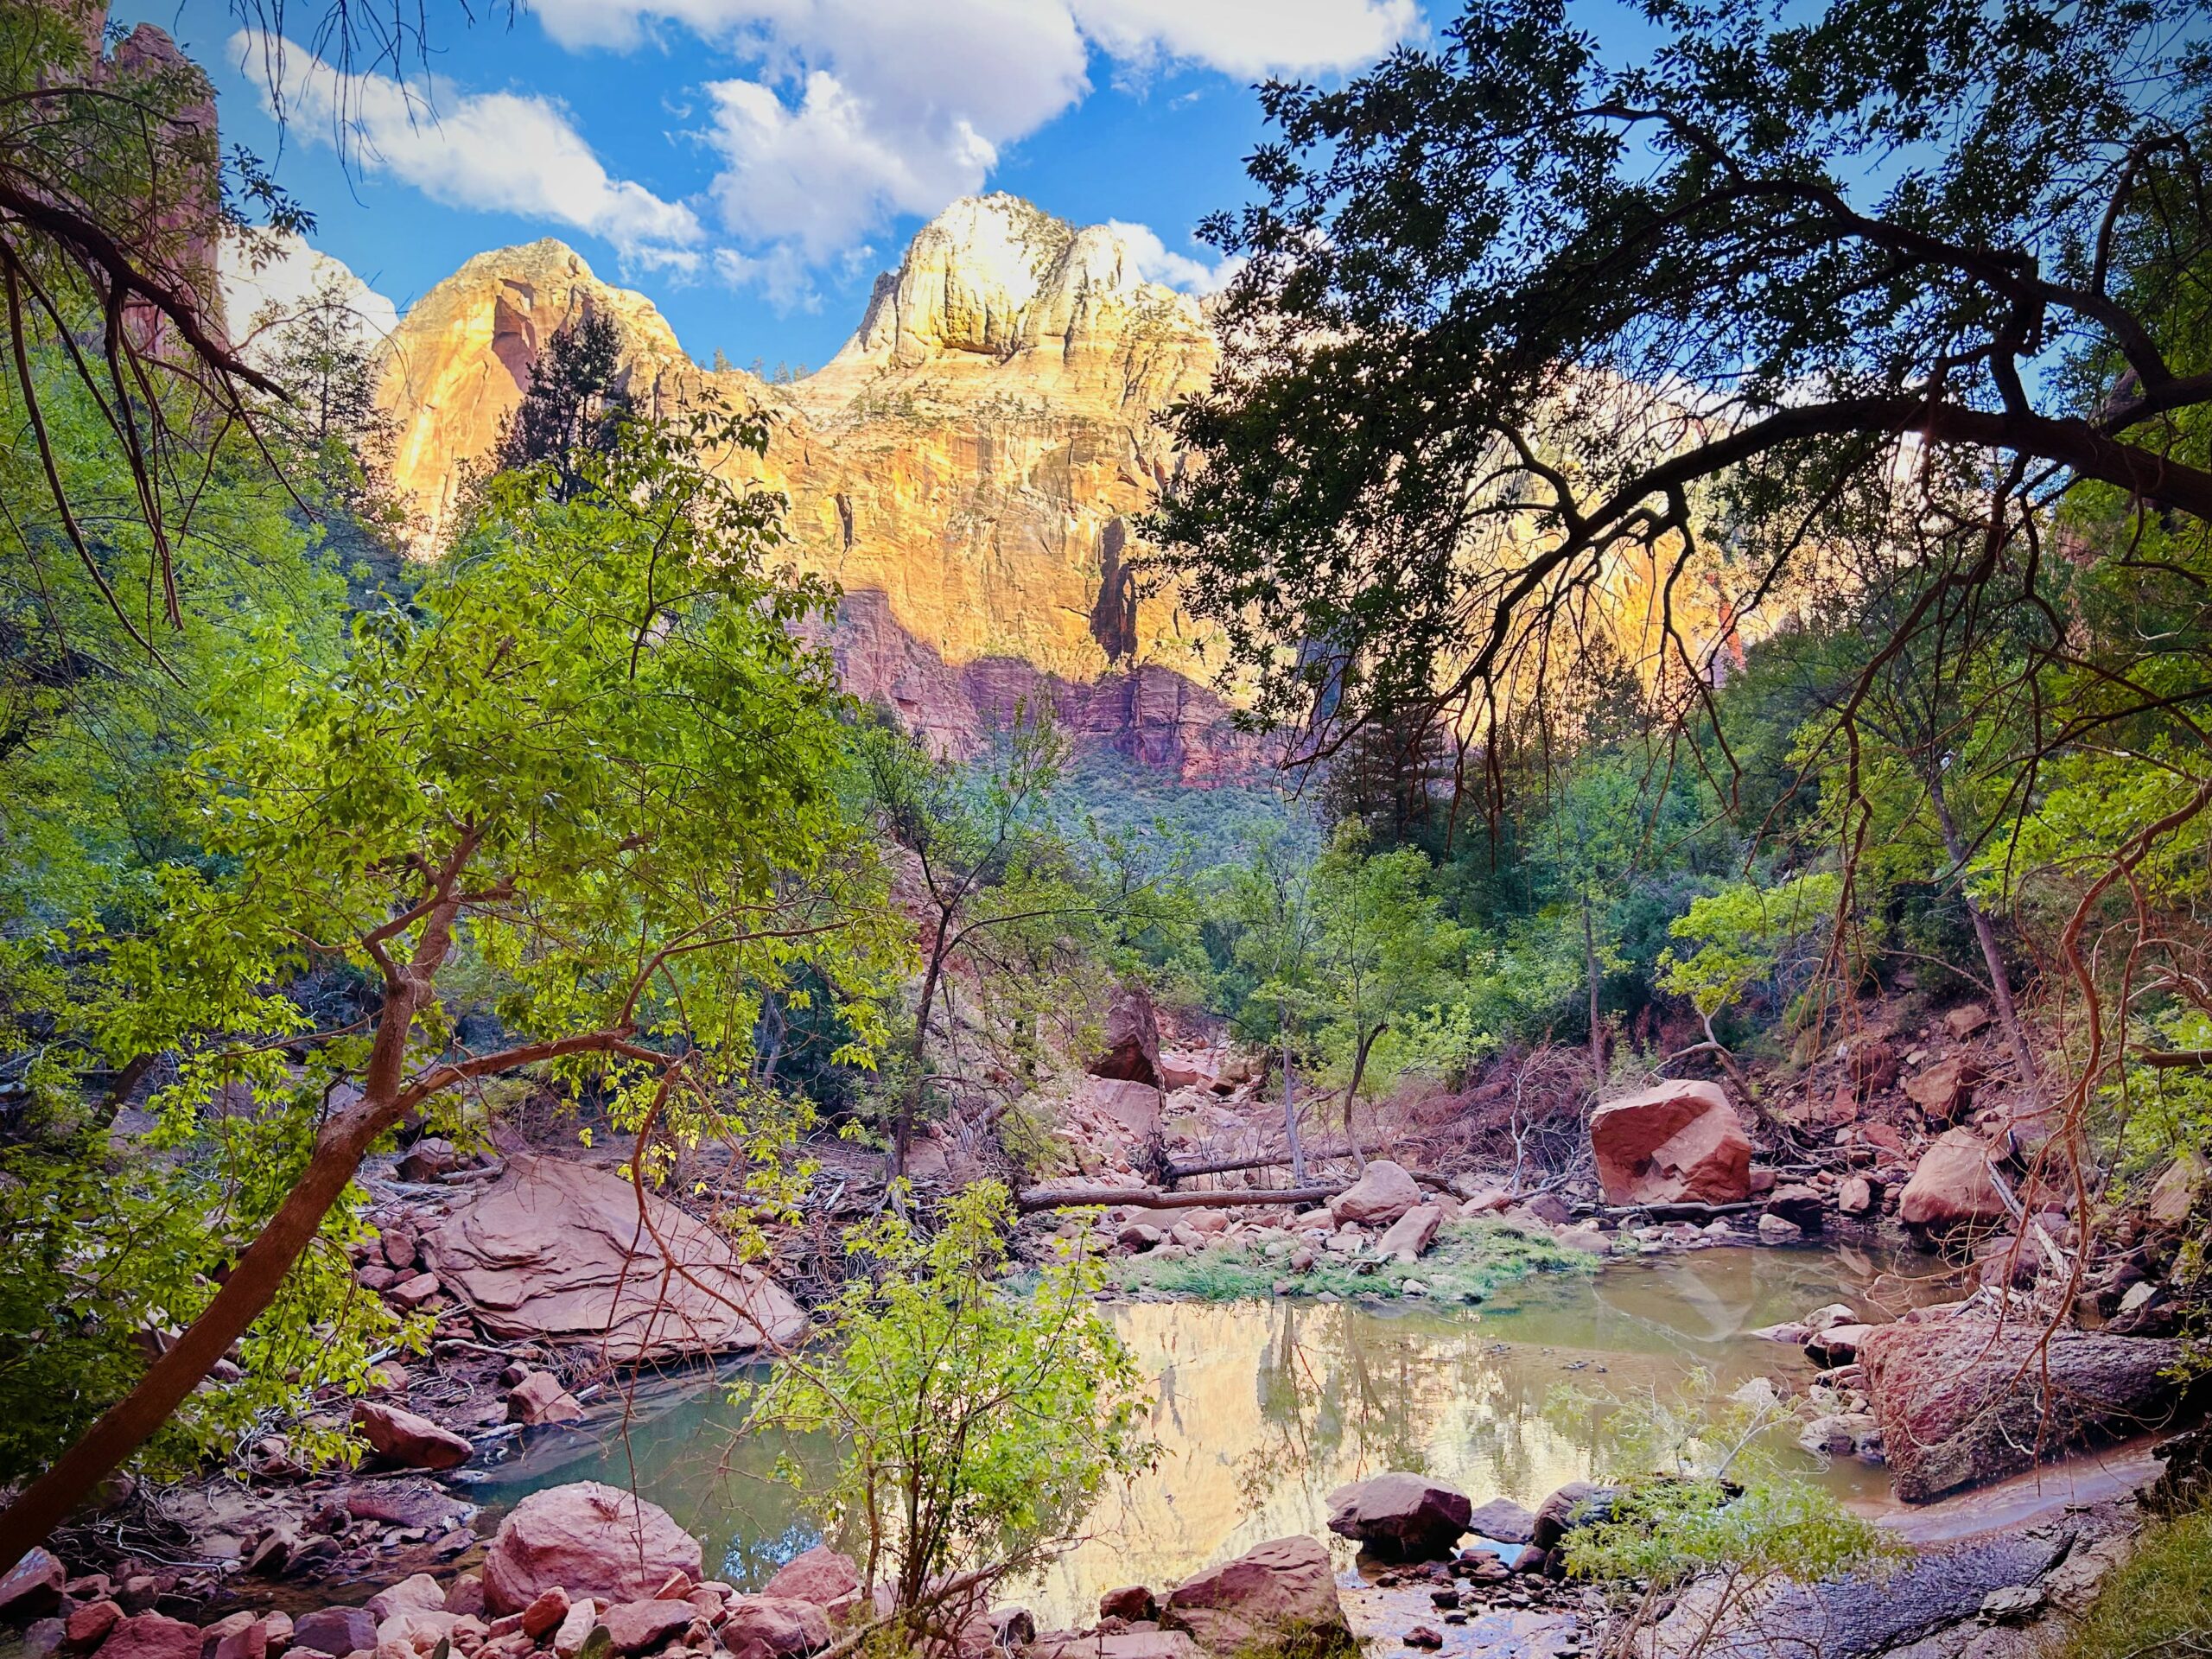
Located in southwest Utah, Zion National Park is one of the most majestic locations in the country, boasting not one, but two hikes that are on any serious hiker’s bucket list.
The Narrows and Angels Landing define adventure hiking by offering iconic multi-mile treks that take you into the depths of a canyon, up roaring rivers, and across narrow passageways with perilous drop offs.
When planning a trip as memorable as this you do not want to waste a minute, so we’ll be exploring how you can get the most out of 48 hours in Zion National Park with our epic 2 day itinerary Zion National Park guide.
4 THINGS TO KNOW BEFORE YOU GO TO ZION NATIONAL PARK:
Before we discuss what to do in Zion National Park in 2 days, let’s tick off your need to knows:
1. There is No Driving in Zion
Unlike Utah’s other national parks, during most of the year, Zion does not allow you to bring your vehicle much further than the parking lot. If you are heading in to do any of the major hiking or sightseeing, you’ll be taking Zion’s shuttle system. The shuttle goes to 9 separate stops throughout the park.
You don’t need a permit or a ticket to ride the Zion Canyon shuttle, but you may need a little patience. During peak season, the lines can get long, so you may find yourself waiting up to an hour to catch your ride.
Pro Tip: Make sure you know when the last shuttle heads back. This changes seasonally. If you miss the last shuttle, and you’re at the furthest stop, you’ll be walking 8 miles back to the visitor center parking lot.

2. Parking Can Get Pricey
While Zion’s Visitor Center does have free parking, there is nowhere near enough spots to meet the needs. If the parking lot is full, don’t worry, there is more parking all up the road near the park…for a price.
Parking ranges from $12 to $30 dollars a day, depending on how close to Zion you want to be. If you are more budget conscious and park further out, Springdale does have its own free shuttle system that will drop you off at the Zion Pedestrian/Bike Entrance.
Pro Tip: If you want to save a little cash and land a coveted free parking spot in Zion, you’ll have to get there early. We went in late September and the lot was already filled by 8am.
The next day, we arrived by 7:30am and grabbed one of the last open spaces. Park Rangers say that during the summer months, arriving before 7am is your best chance at grabbing a spot.

3. Gear Up for the Narrows
The Narrows is one of the most sought after trails in the world, but most people don’t own the gear to have the optimal hike. Fortunately, there are multiple places in Springdale that can rent you equipment to help you manage the Narrows.
Places like Zion Outfitter and Zion Guru will rent you a package that includes canyoning boots made for slippery conditions, neoprene socks that dry quickly and minimize blistering, and a hiking pole so you can keep your balance amongst the rushing water and the rocks.
While hiking kits are by no means necessary, they make a tough hike much more manageable. After you gear up, make sure to ask about the water levels for the day.
Your outfitter will be able to help you understand whether you’ll be facing ankle deep, knee deep, waist deep, or chest deep water. Knowing that information can help you better decide if, and how far, you may be willing to go with your Narrows hike.
Pro Tip: You’ll also want to think about putting any food, cameras, phones, etc. in a zip lock bag or two. If you stumble while fording the river, which many people do, those valuables can suffer some severe water damage.
If you don’t want to hire here’s a quick list of things you will need to bring (but might forget:
- Daypack/Dry pack;
- Water Bottle;
- Hiking Boots;
- Sun Protection;
- Clothing Layers;
- Hiking Poles.

4. The Angel’s Landing Lottery
In the last few years, the number of hikers summiting Angel’s Landing has skyrocketed. To remedy the issue Zion instituted a lottery system for Angel’s Landing. There are two types of lottery; the Seasonal Lottery and the Next Day Lottery.
If you know months in advance when you’re going, the Seasonal Lottery offers you a higher chance to get a permit. The Seasonal Lottery also allows you to pick multiple days to apply for at once. The Next Day Lottery means you apply the day before you hope to hike Angel’s Landing. The Next Day Lottery closes in the afternoon and you’ll get a confirmation or rejection by the evening.
Pro Tip: The odds of you getting a permit during peak season are rumored to be about 20% and dropping each year. If Angel’s Landing is a must, and you have flexibility in your schedule, then apply every day you are able. I talked to more than one person who stayed in the area for a week, applied every day, and still didn’t win while others won on their first try.

Zion National Park 2 day itinerary
Now that you’re prepared for Zion, let’s set a two day itinerary. There’s lots to do in Zion National Park in two days. The way I’ve set this up is for maximum impact. That means I’m focusing on the two essential hikes; The Narrows and Angel’s Landing.
These are not considered easy hikes in Zion so if you want something easy you can check out our easy hikes in Zion post. BUT if you are not scared of heights you will want to attempt these 2 hikes in Zion in 2 days.
The rest of the schedule is filled out around them. That also means I’ve put the best things earlier in the day.
That way you get there early, avoid the heat, and you can stop if you get tired without missing your must-do adventures.
Pro Tip: If you want to spend up to 4 days in the National Park, you can check out our Zion National Park itinerary for additional recommendations.
How many days in Zion National Park?
You could probably spend a week in Zion and not get bored as there are over 50 hikes in the area to complete.
A Zion two day itinerary is enough to tick off the two iconic hikes in the park – Angel’s Landing and the Narrows and a few of the smaller ones in the afternoon (if you aren’t too tired)!

One Day in Zion National Park:
1. The Riverside Walk
- Shuttle Stop: 9 • Temple of Sinawava
- Distance: 1 mile (2 miles round trip)
- Elevation: 57 feet
- Difficulty: Easy
This pleasant, paved, walk will take you right to up to where the Narrows hike begins.
The benefit of the Riverside walk is hearing the waters roar beside you, enjoying the chipmunks chittering away, and you get a perfect glimpse into the Narrows experience.
So, if you want to get a feel of the canyon walls closing in on you without getting wet, then Riverside is the hike for you.


2. The Narrows
- Shuttle Stop: 9 • Temple of Sinawava
- Distance: Up to 10 miles
- Elevation: Up to 695 feet
- Difficulty: Moderate to Hard
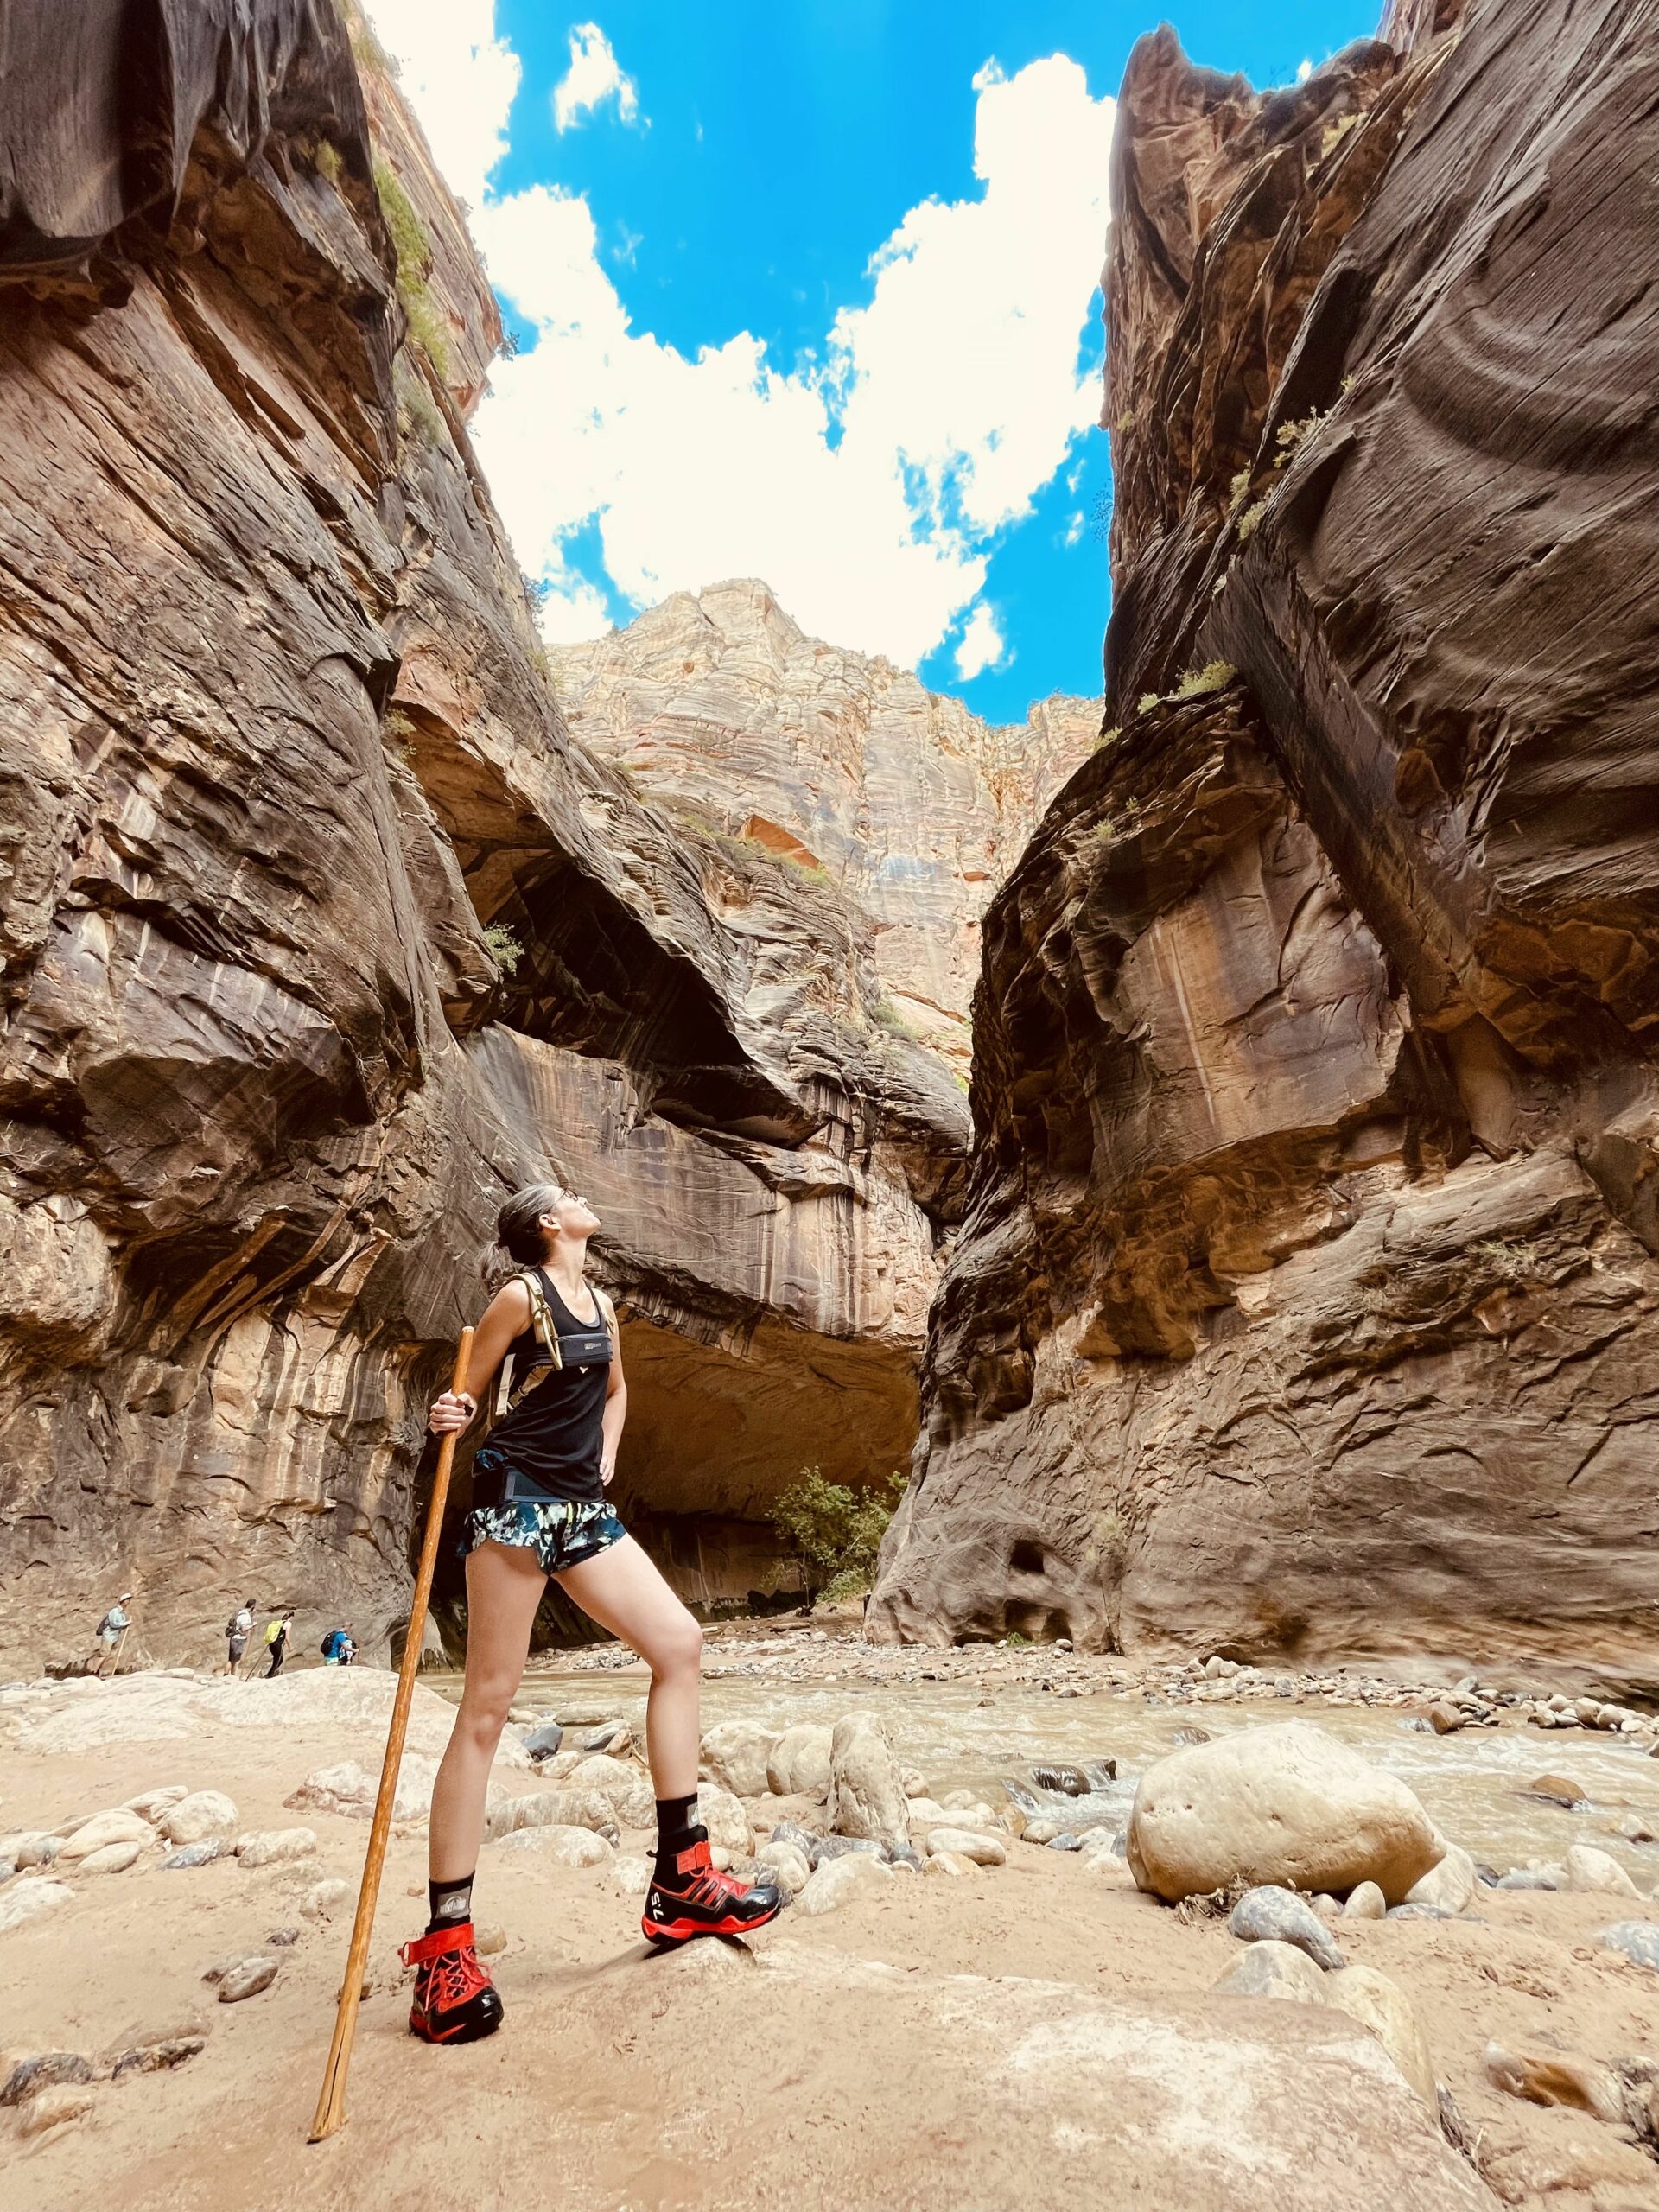
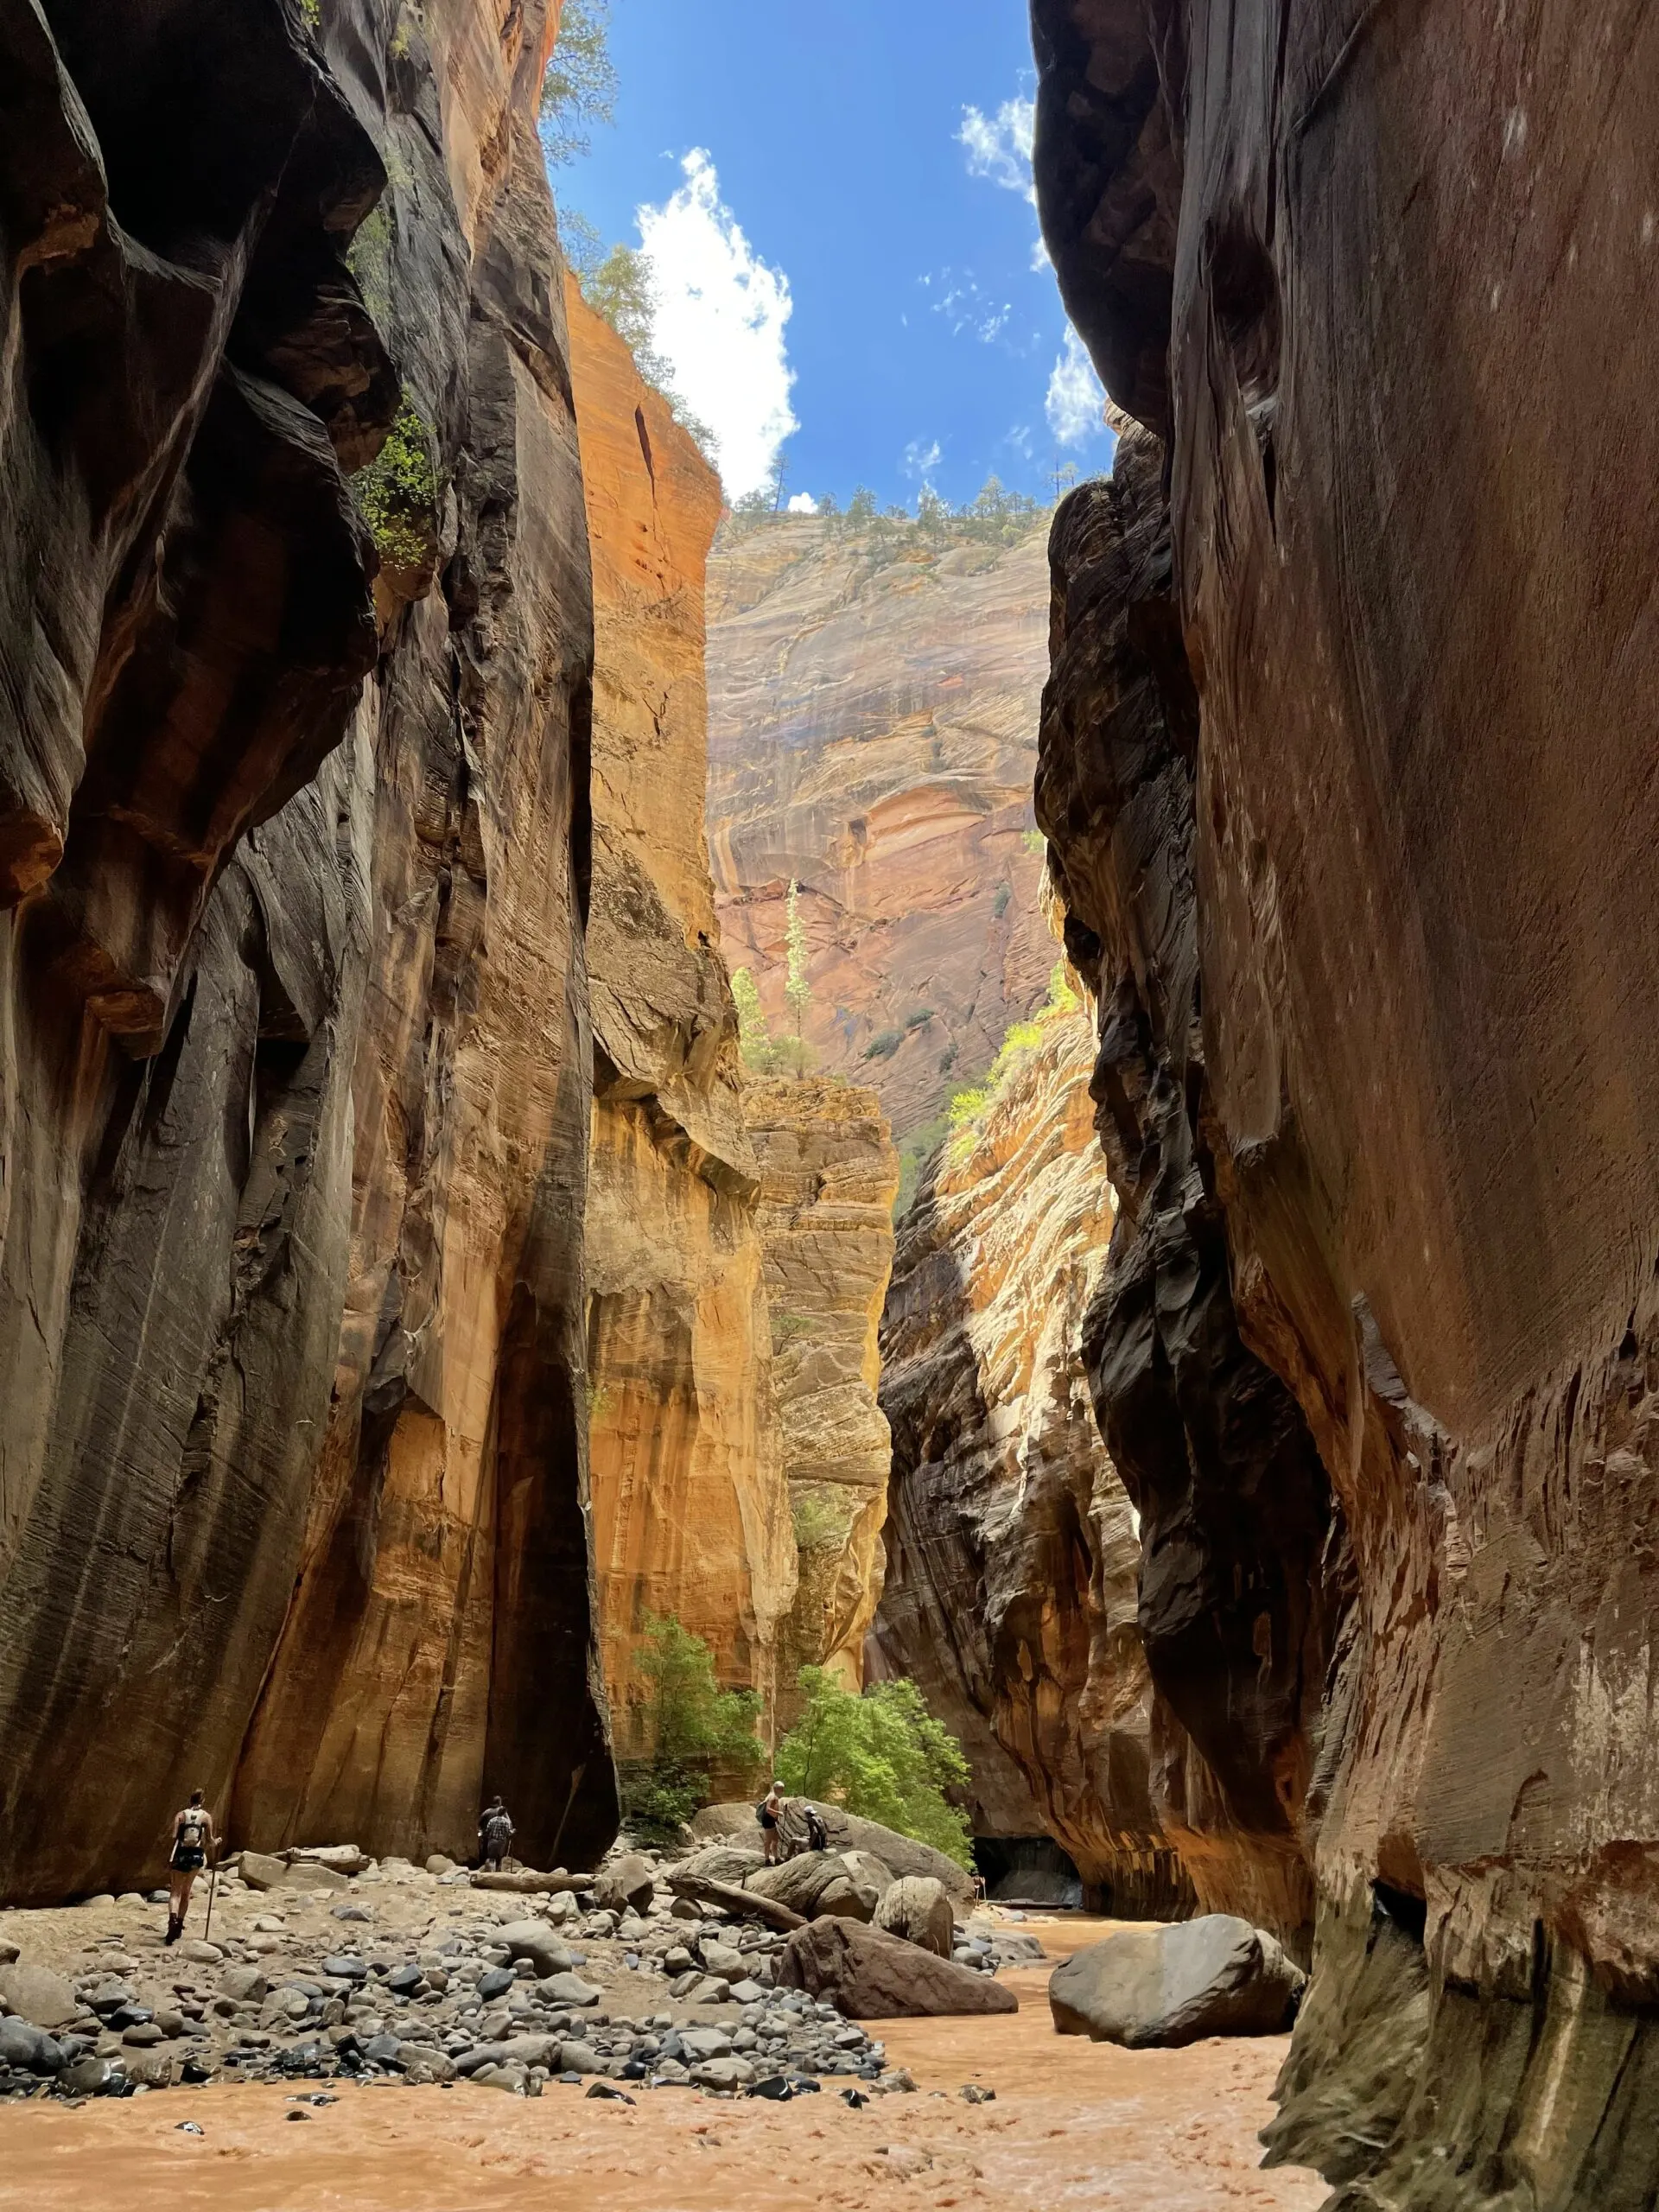
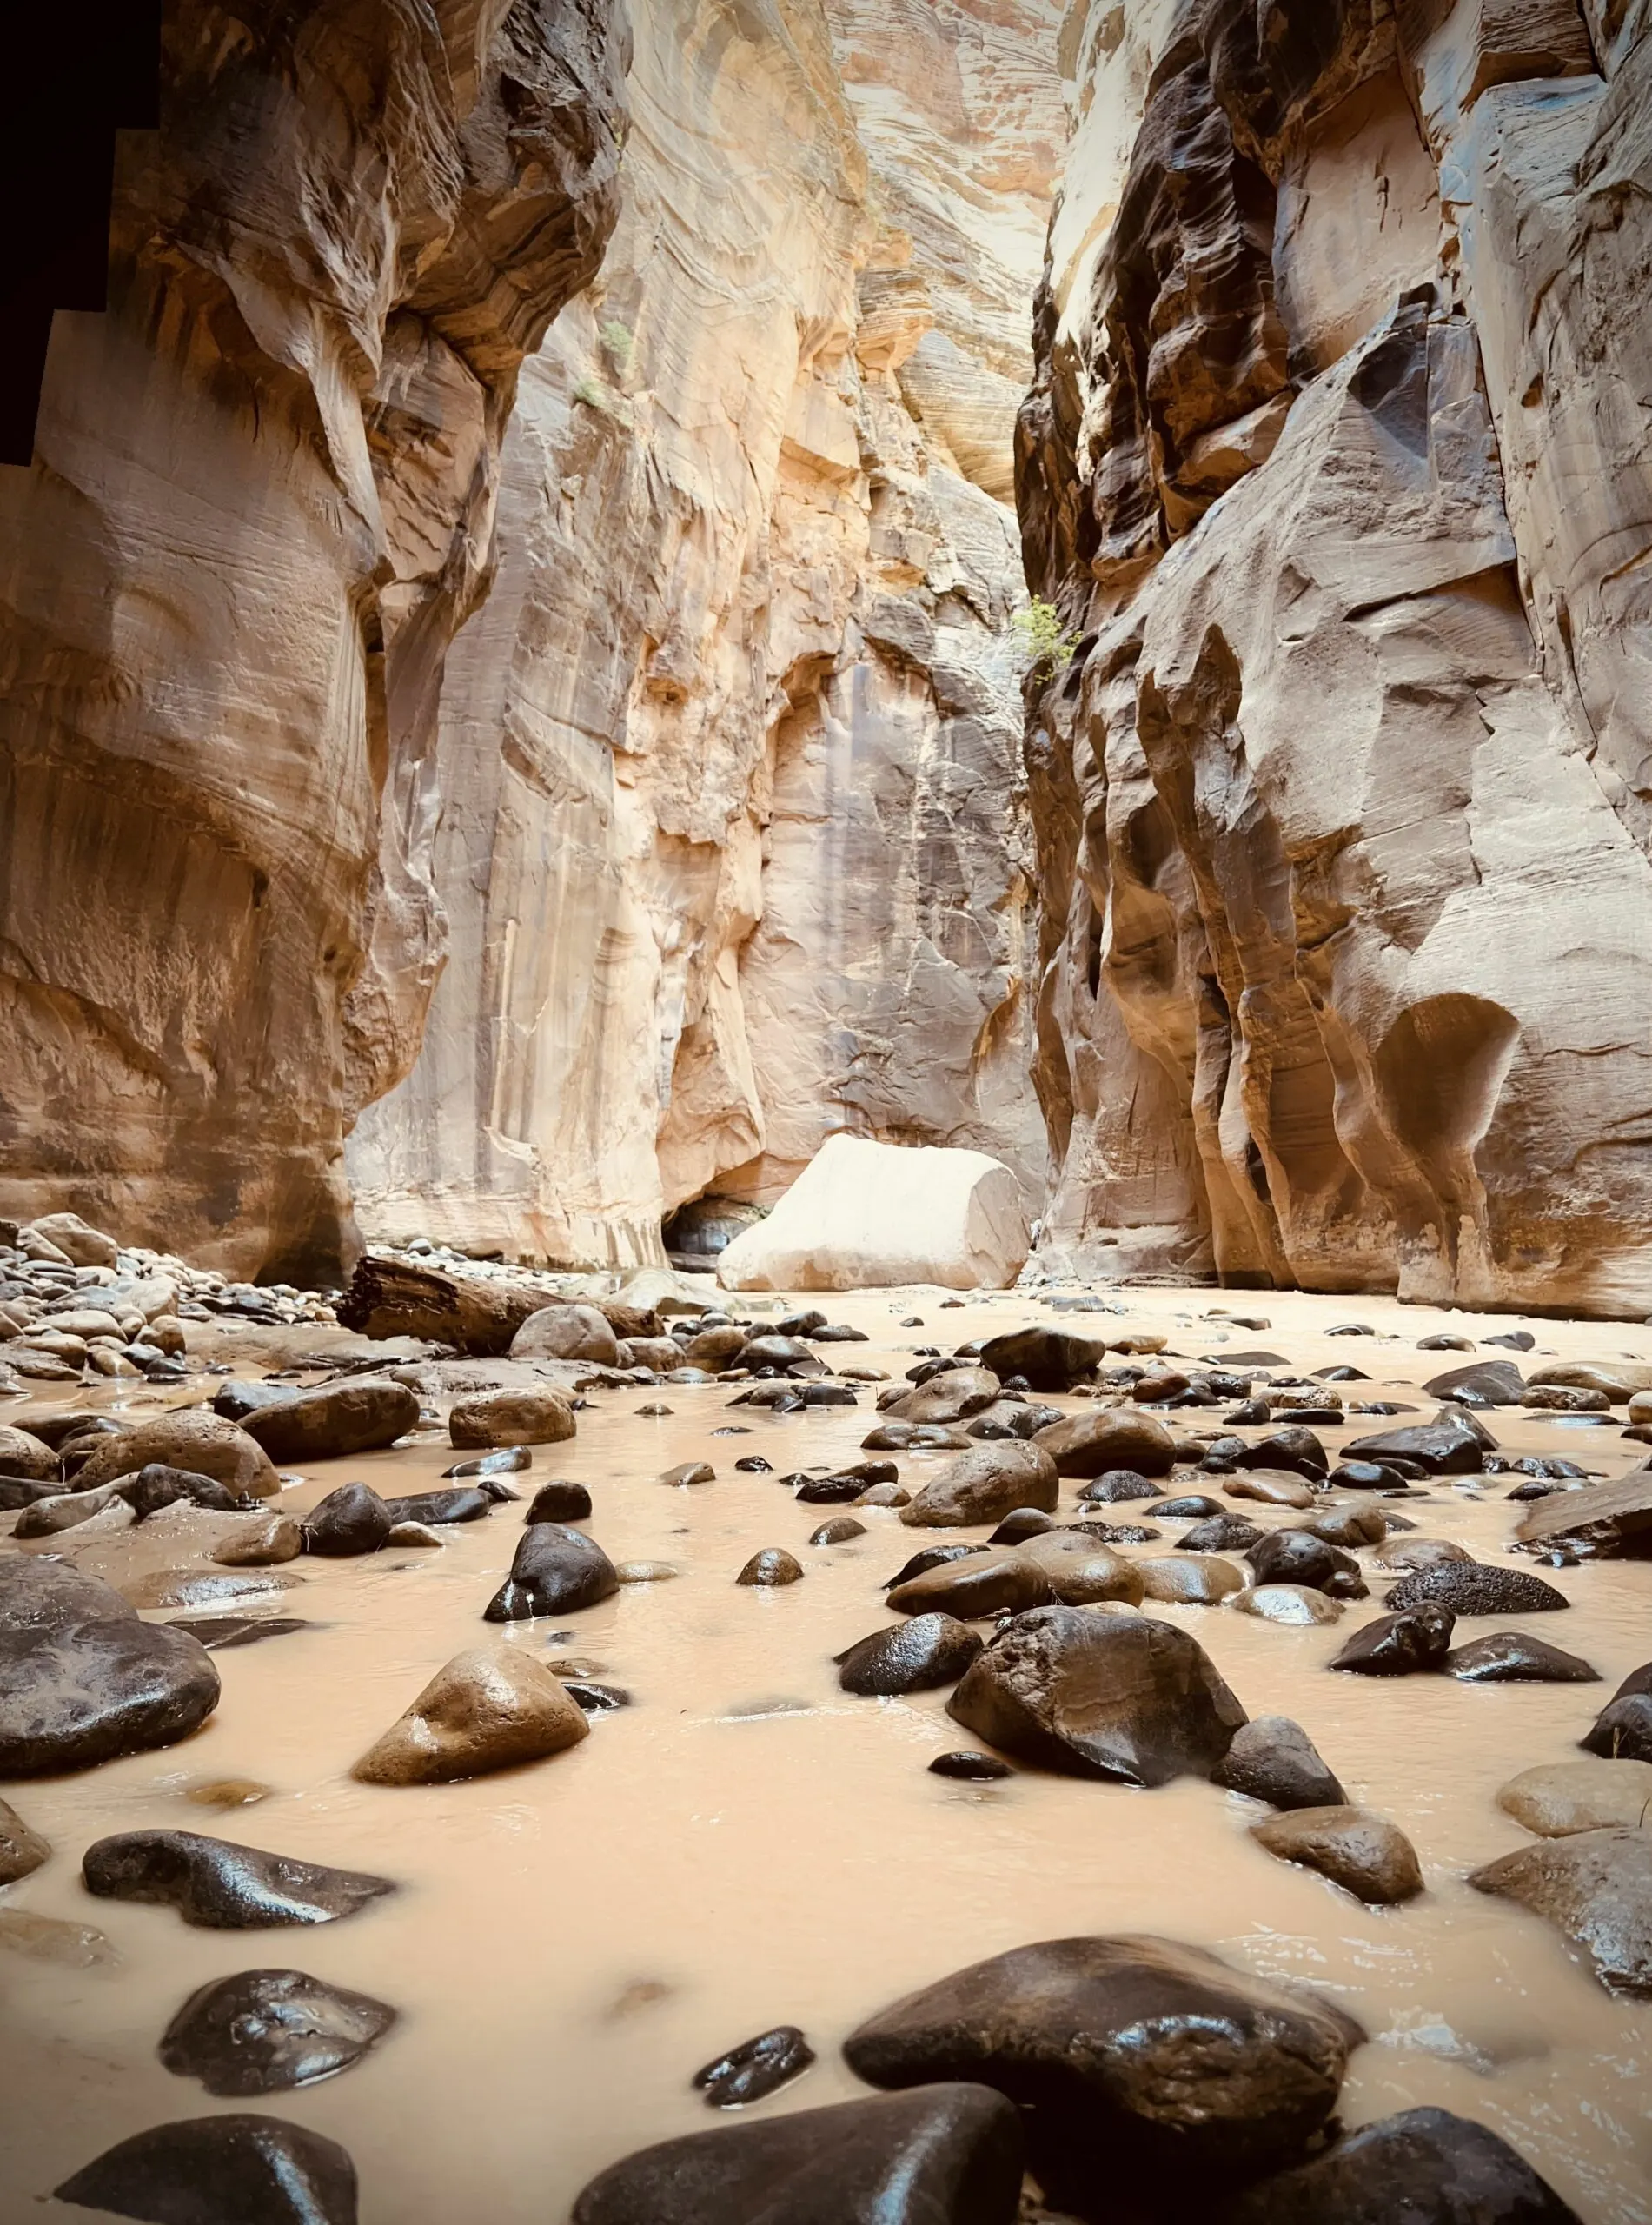
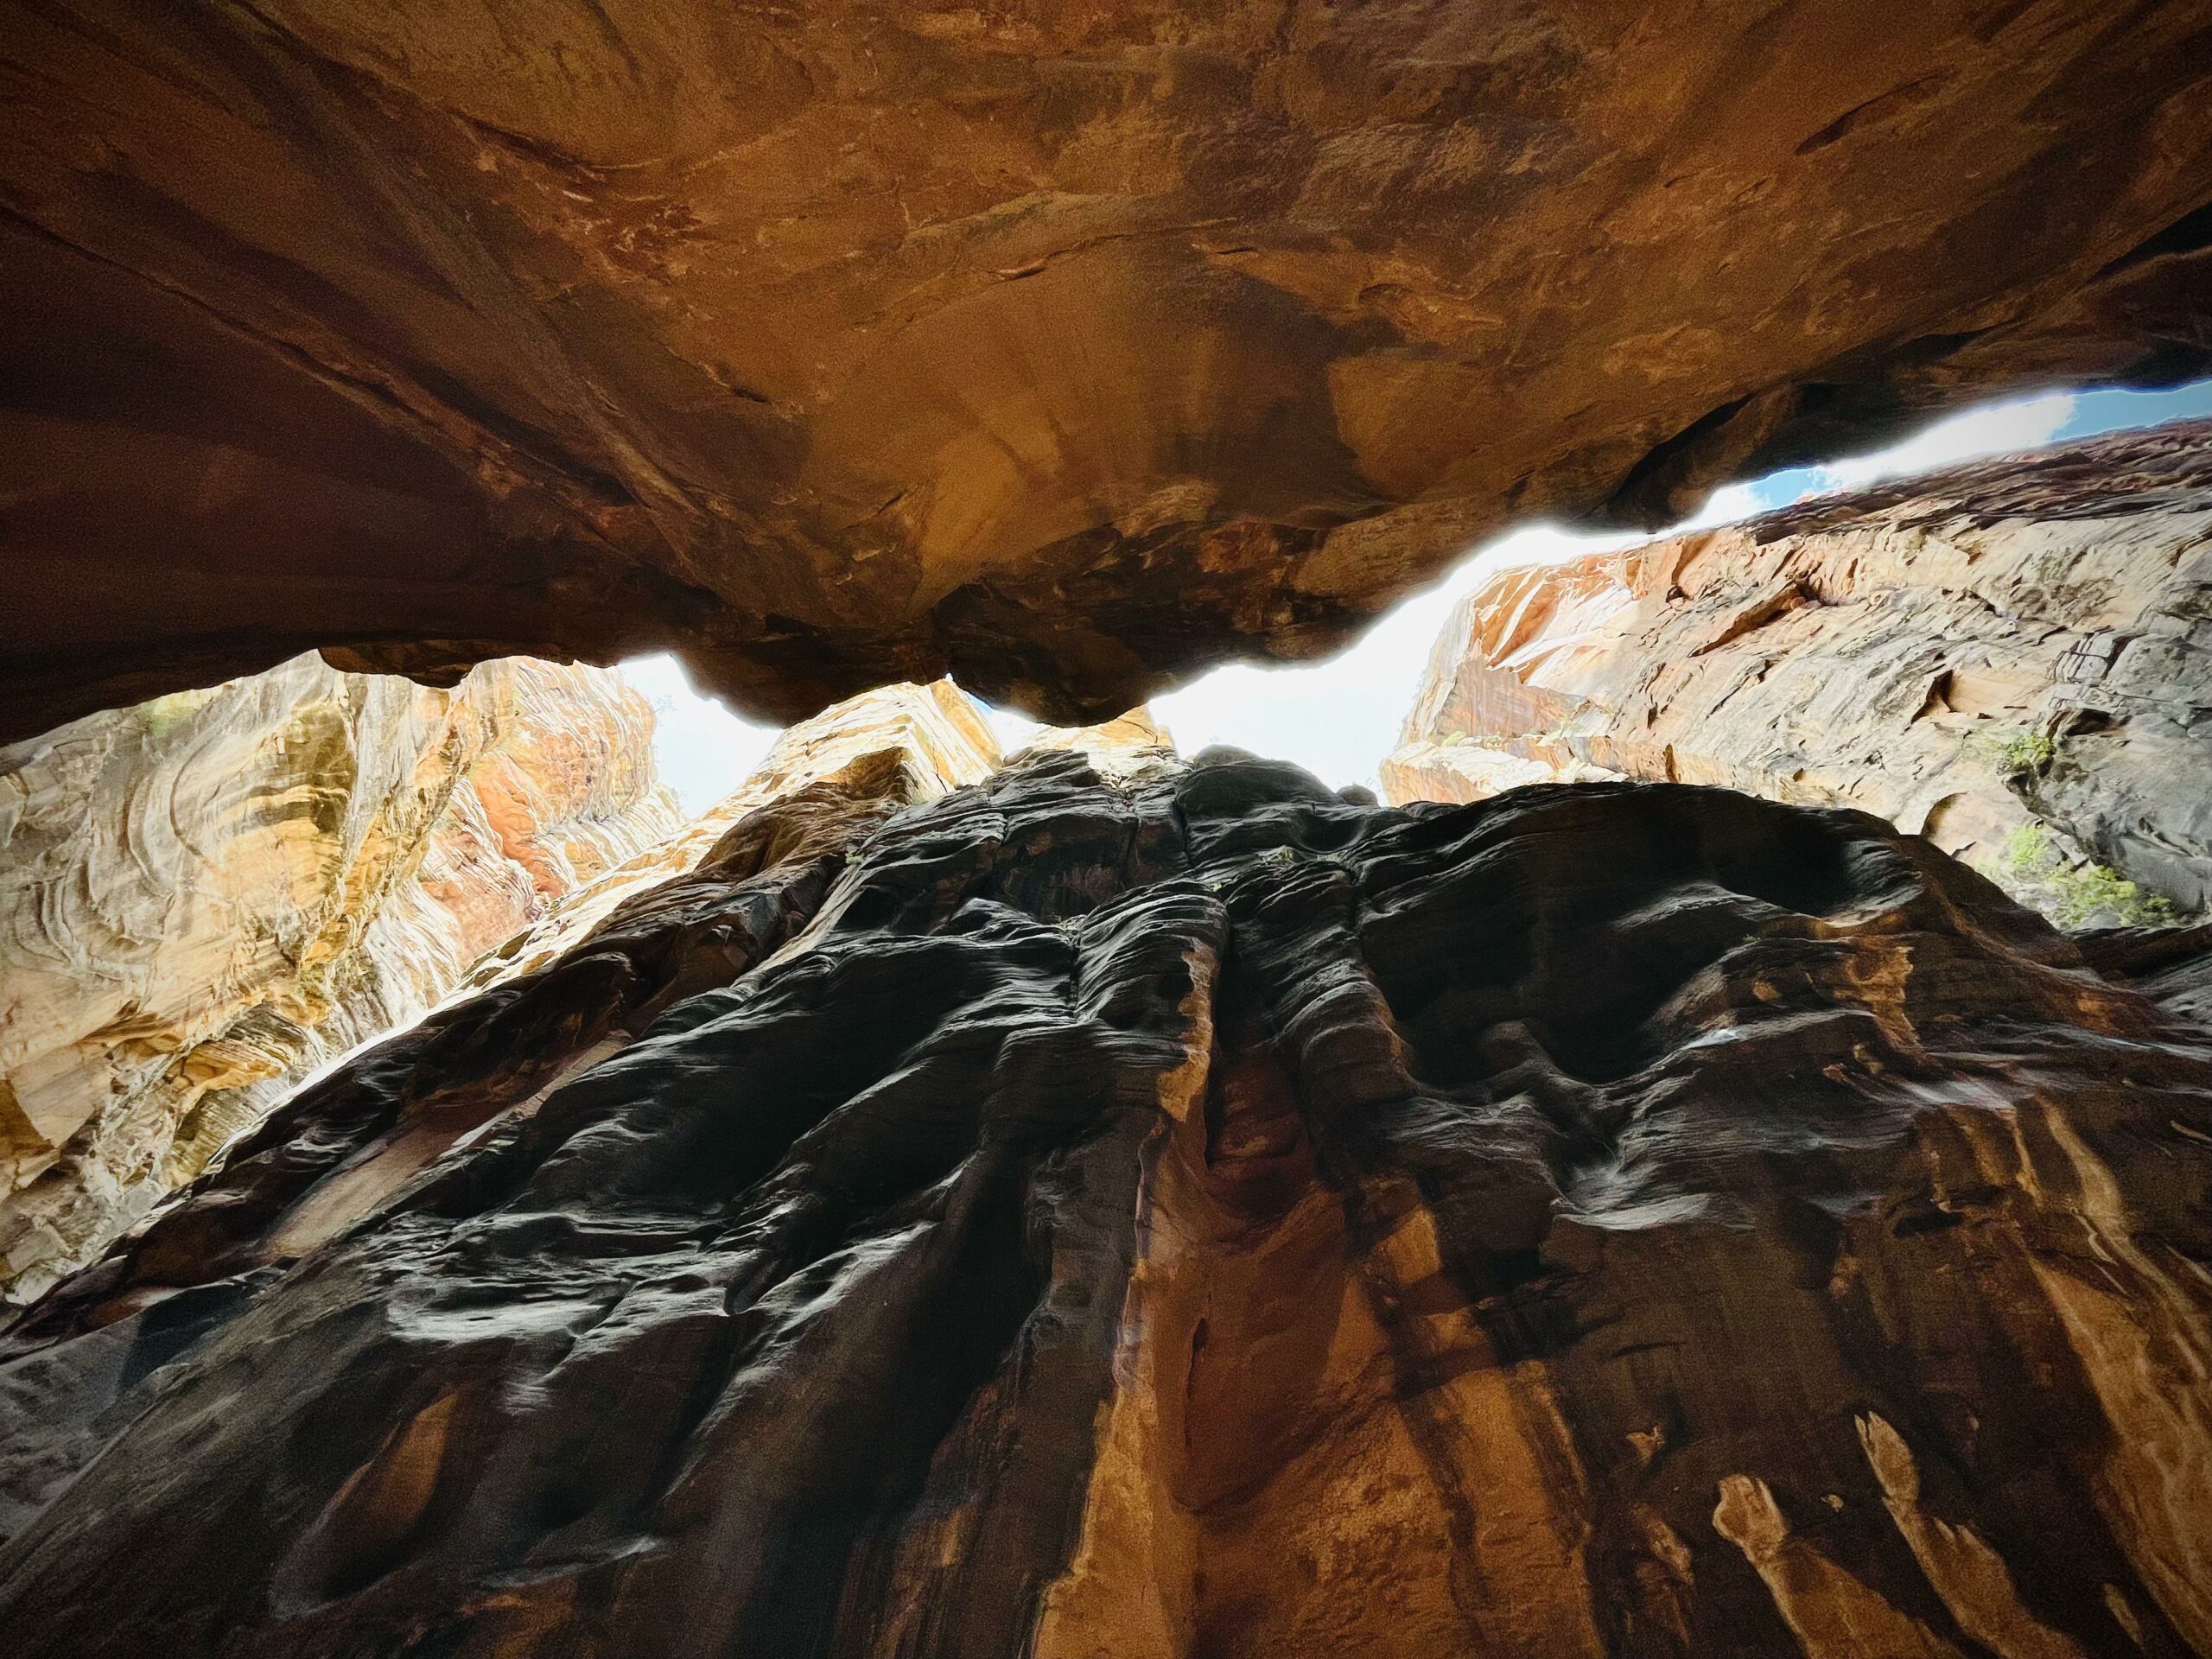
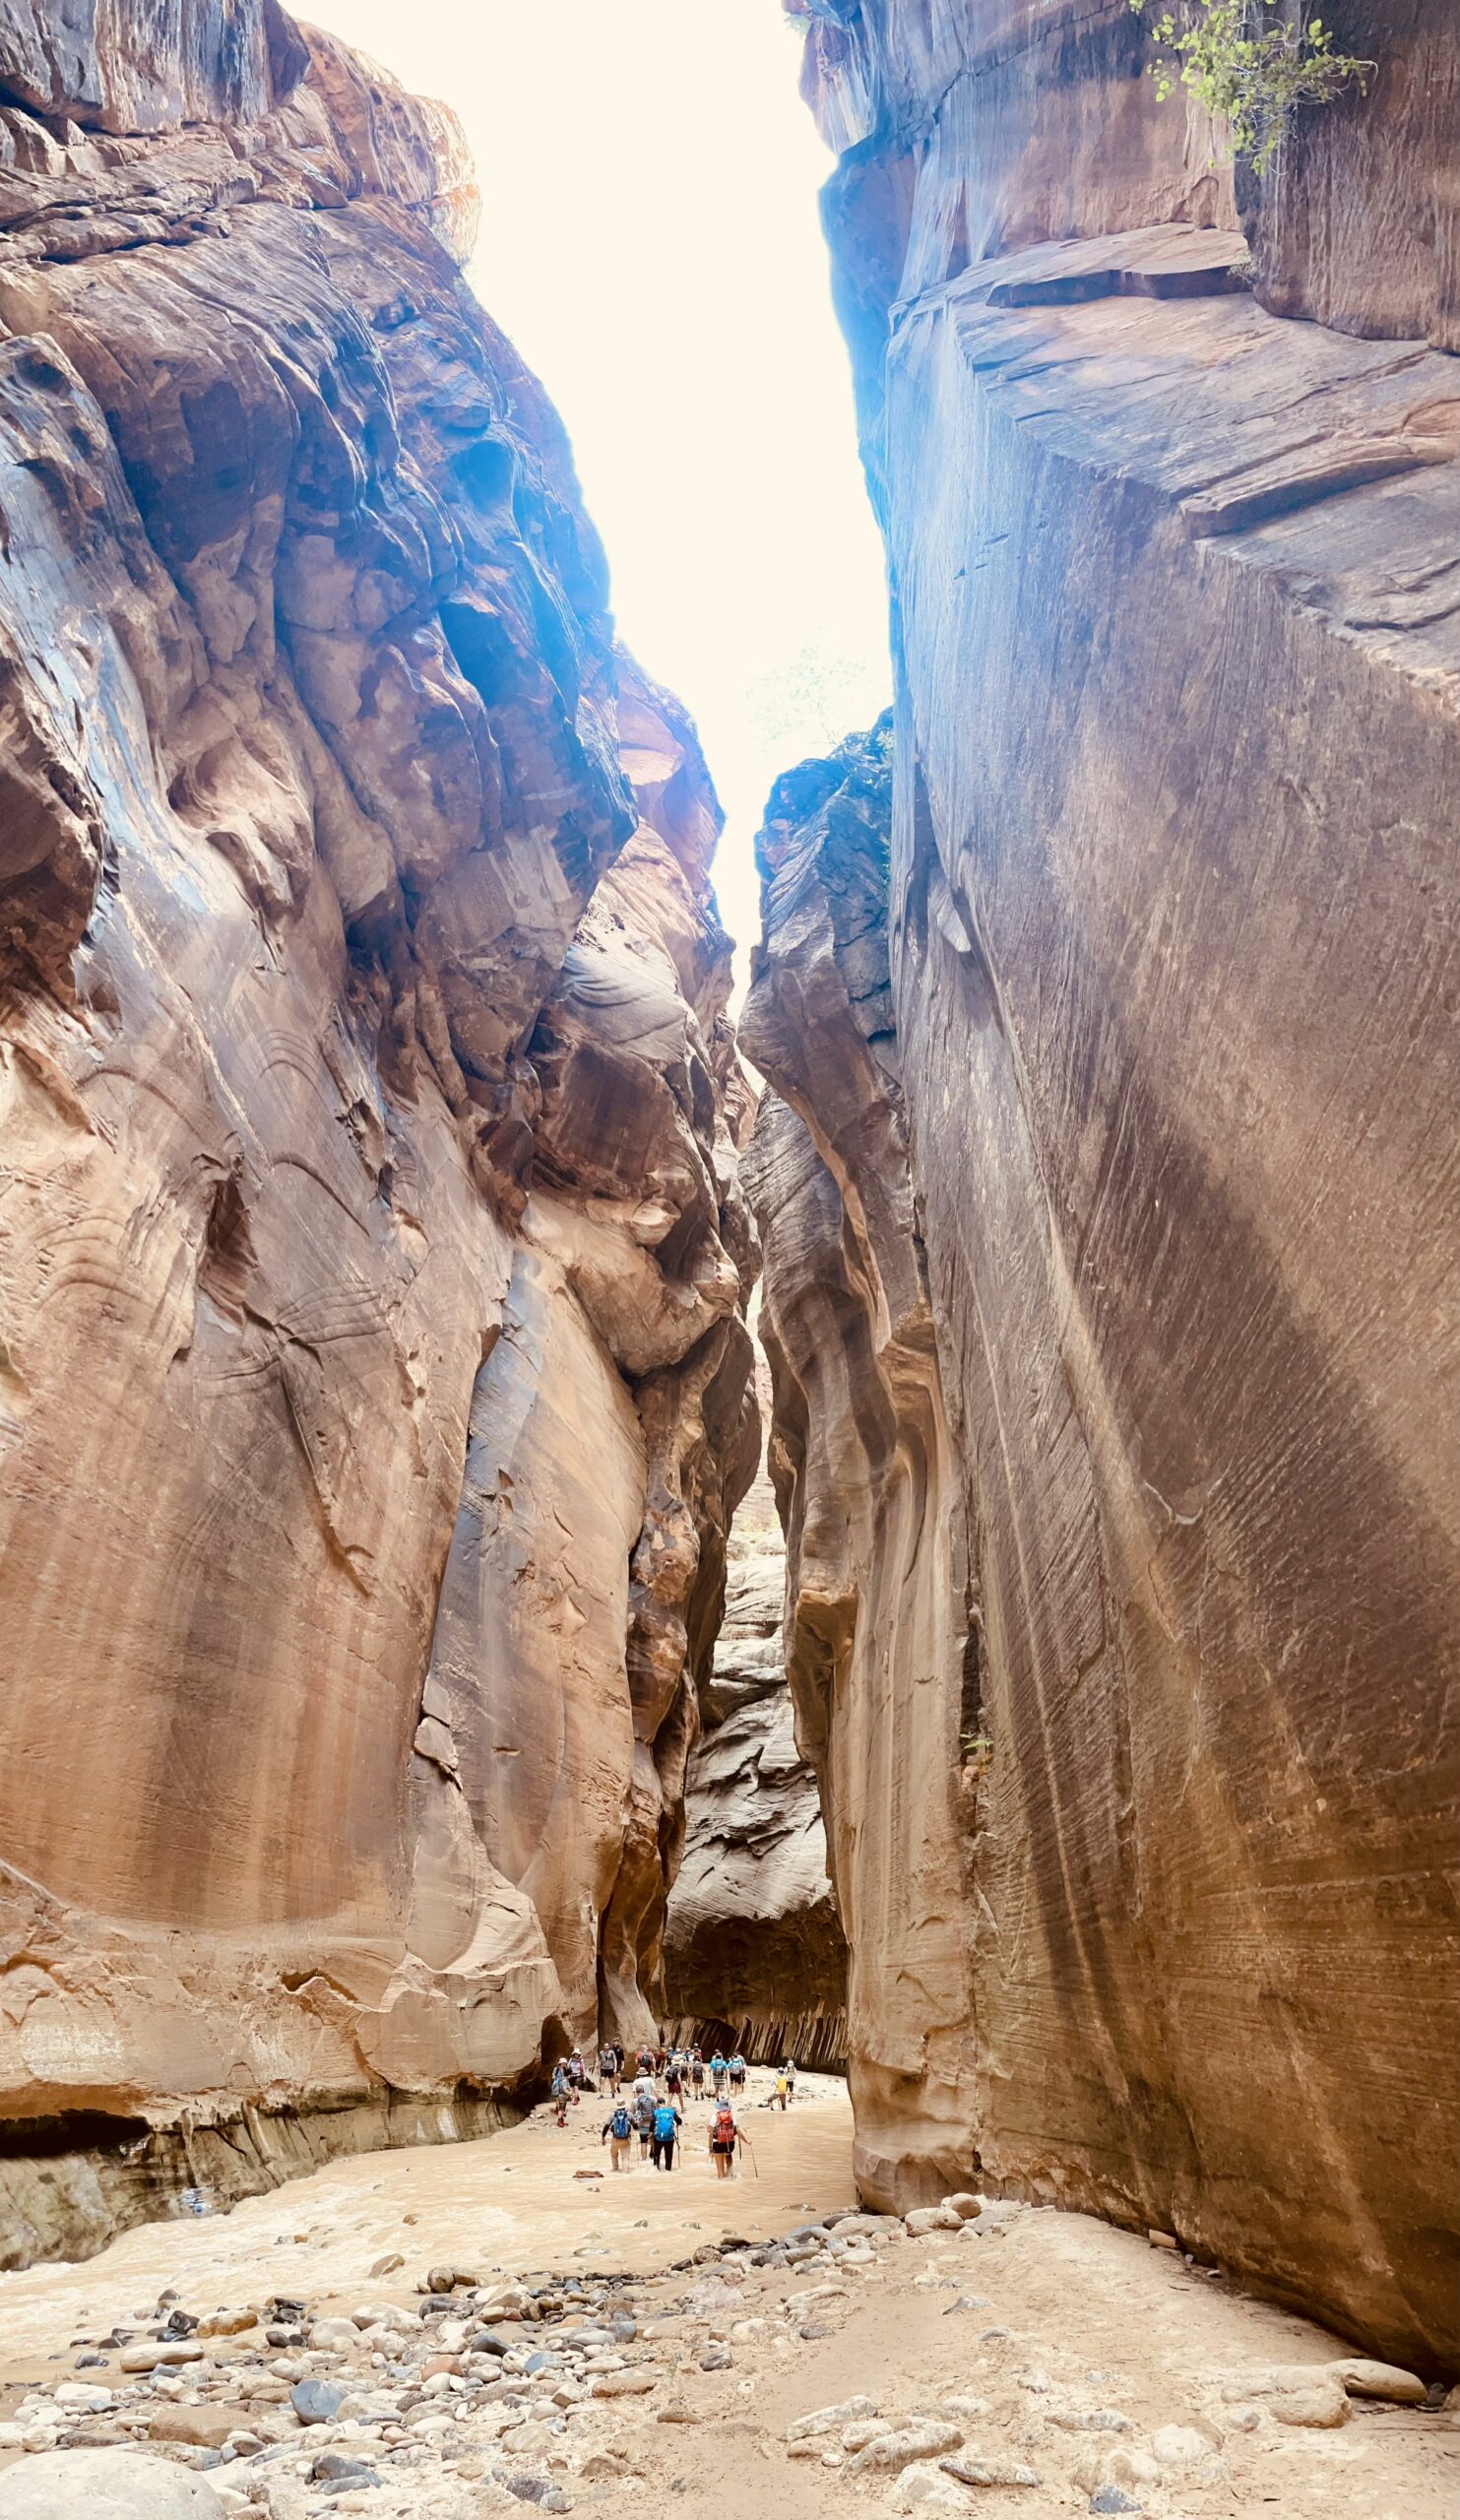
The Narrows is one of the most famous hikes in the entire world. People flock from all over the globe to wade through the chilly waters of the Virgin River and revel in the cliff walls towering all around you.
I realize that many people get intimidated by the 10 mile distance but (a little hiker’s secret) very few make it all the way to the end.
With that in mind, let’s break this amazing adventure into five stages that offer natural turn around points for a hiker.

Stage 1 • The Riverside Walk (see above)
Stage 2 • To Mystery Falls • .5 miles from Riverside (3 miles round trip)
Hiking to Mystery Falls will give you a taste of the Narrows experience without spending too much time or energy on the trip. Plus, you’ll end up at a nice waterfall before heading back.
Stage 3 • To Orderville Fork • 1.5 miles from Mystery Falls (6 miles round trip)
This is the first point where time invested and mileage put in causes a good percentage of people to turn around. There is a fork in the canyon that, to the left, takes you to Wall Street, the most famous part of the Narrows.
You are currently 3 miles from the Temple of Sinawava shuttle stop. If you’ve made it this far, I’d highly recommend doing at least another quarter to half a mile into Wall Street, as it is the best part of the entire hike.

Stage 4 • To the End of Wall Street • 1 mile from Orderville Fork (8 miles round trip)
Wall Street is the narrowest part of the Narrows, measuring as slim as under 30 feet across. While there is no sign to mark the official end, you’ll clearly notice when the walls start widening and the river gets deeper.
You’ll also notice two giant boulders in the stream. At this point the exhaustion of working 4 miles upstream and the realization of returning 4 miles downstream takes its toll on most hikers.
That means the high majority of people turn around when Wall Street ends, especially as the best of the hike has passed.
Out of the hundreds of people we began with, only a couple continued on to the end. We were amongst the many who called the End of Wall Street a good time to call it a day and begin our return.
Stage 5 • To Big Springs • 1 mile from the End of Wall Street (10 miles roundtrip)
Making it all the way to Big Springs is primarily for those who like to see a hike through to completion and have the energy to do so. From the reports of hikers we met along the way, the rest of the hike was less impressive than Wall Street and the waters get deeper. The primary prize is the bragging rights of having officially made it to the end of the Narrows.
A good rule of thumb for the Narrows only go as far as you feel comfortable. Just remember that every step you take away from the Temple of Sinawava shuttle stop is a step you have to take back.
Fortunately, the rule of thumb is that it takes half the time to hike back that it took you to hike up.
I also recommend getting an early start because you can hike the Narrows quickly, but half of the fun is stopping, gawking, and taking endless amounts of photos of the unparalleled beauty surrounding you.
That means the time can slip by you quicker than the waters rushing around your feet and you don’t want to get caught in the canyon when it gets dark.

3. See the Condors at Big Bend
- Shuttle Stop: 8 • Big Bend
- Distance: 100 feet
- Elevation: 0 feet
- Difficulty: Easy
Generally, I would recommend more hikes for the day but the Narrows isn’t a normal hike, it’s a fight against and through water. Considering most people go up the Narrows until they reach the stage that they are worn out, it is the only event for the day. Plus, you come away from it wet, and with wet shoes you don’t want to venture out on another hike.
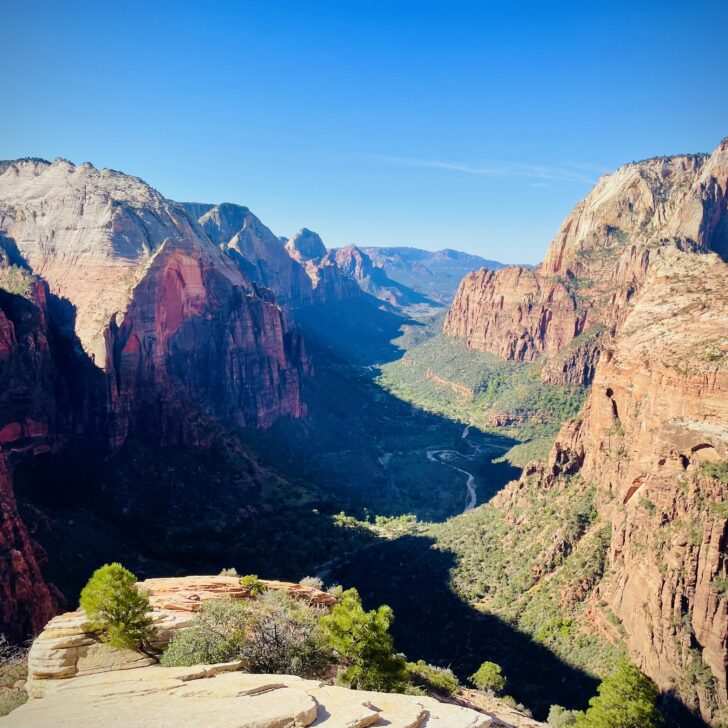
Instead, enjoy stop #8, Big Bend. Big Bend is an observation spot where the Virgin River rushes below you and Angels Landing towers above.
With a little patience you’ll see two things. You’ll catch occasional glimpses of hikers making their way across the spine of Angels Landing.
More importantly, you’ll see majestic condors gliding across the sky or working on their nests in the crevasses of the cliff. The shuttle gives you the perfect window to hop off, capture a few memories, and about the time you’re finished another shuttle will be pulling up.

2 Days in Zion National Park
Day two in Zion National Park begins with 1. Scout Lookout or 2. Angels Landing (depending on whether you scored a permit)
It’s rare for a park to have one iconic hike, but Zion is lucky enough to have two. The Narrows and Angel’s Landing both sit at the top of hiking lists across the world.
We’ve already discussed the Angels Landing Lottery in the 4 Things to Know Before You Go section.
Since the lottery is a fickle mistress, I’ll note two separate stops, depending on whether or not you hit the Angels Landing jackpot. Scout Lookout is a part of the Angels Landing hike but can be done without needing to win the Angels Landing lottery.
1. If You Didn’t Win the Lottery – See Angels Landing via Scout Lookout
- Shuttle Stop: 6 • The Grotto
- Distance: 4.5 miles
- Elevation: 1000 feet
- Difficulty: Hard
Note: While it is certainly a disappointment that you can’t make it all the way to the summit of Angel’s Landing, you can still take the spectacular, winding, hike up to Scout Lookout.
This hike will give you a workout and you’ll be rewarded with the photographs that most websites show anyway; the quintessential shot of Angels Landing.
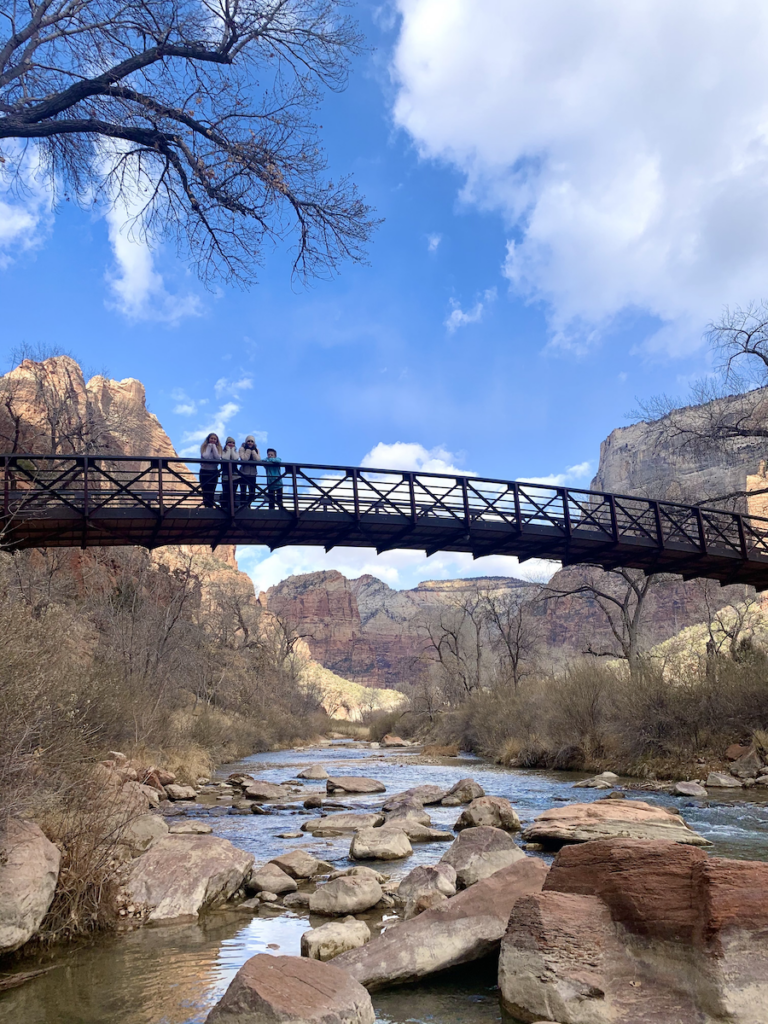
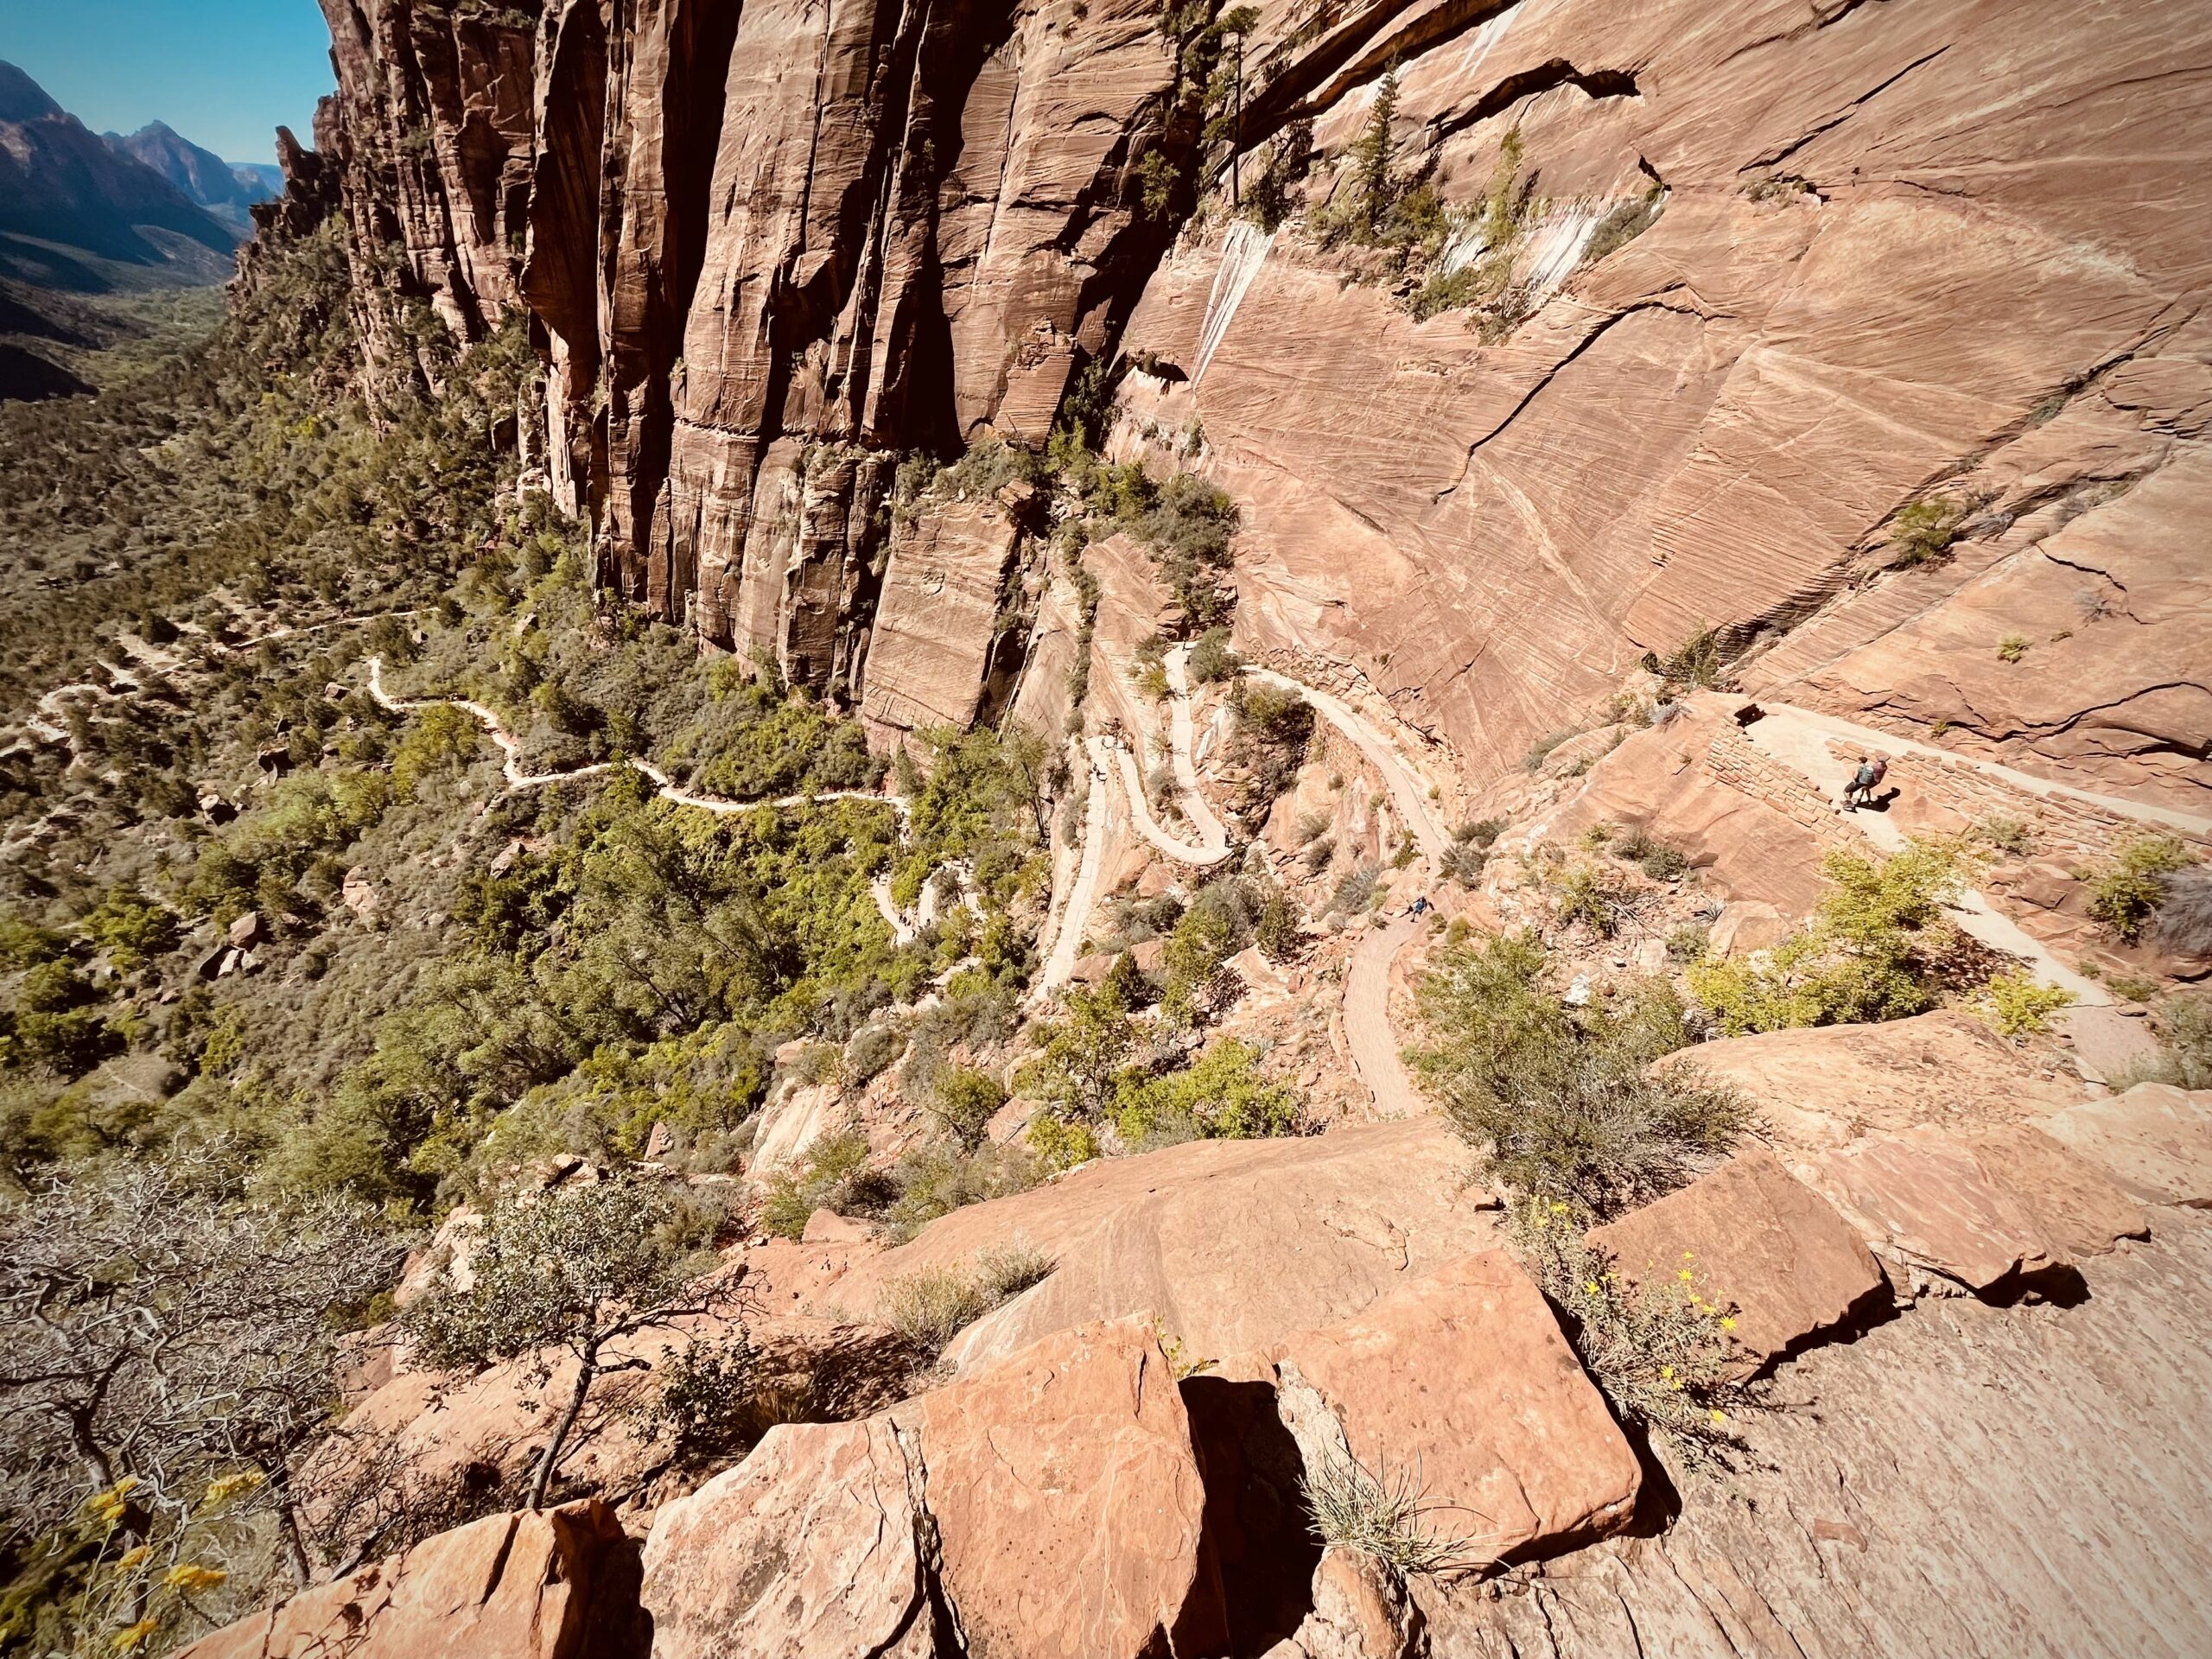
You’ll begin by hopping off the shuttle at Stop #6, the Grotto. Crossing the street and a bridge across the Virgin River you’ll likely find your first set of Rangers reminding you a permit is required to hike Angels Landing. This isn’t them saying you can’t go further, they just want to make sure you know how far you can go.
If you’re going to gather a thousand feet in a couple of miles, it means you need to be prepared for a rigorous uphill climb. The hike quickly turns into a series of strenuous switchbacks. The saving grace on your calves is that you’ll be stopping every few minutes to admire the view of the valley.

At the halfway point you’ll find yourself in Refrigerator Canyon. This is a good place to take a breather because it is both the only level part and the only shady part of the hike.
If you stop here, please note the signs asking you to keep you voices down because Refrigerator Canyon is home to sleeping owls. Apparently, owls don’t appreciate people yelling while they’re trying to sleep any more than humans do!
Making your way out of Refrigerator Canyon you’ll find another series of switchbacks, tighter and steeper than the last. Once you’ve huffed and puffed your way up those you are to Scout Lookout.
Here you’ll find bathrooms and a fork in the road.
You are offered 3 options. 1) Continue on the West Rim Trail. 2) Continue on to Angels Landing or 3) Turn back.
If you are not going on Angels Landing I’d recommend doing another quarter mile of the West Rim Trail before turning back, as it offers a few more quality viewpoints of Angels Landing.

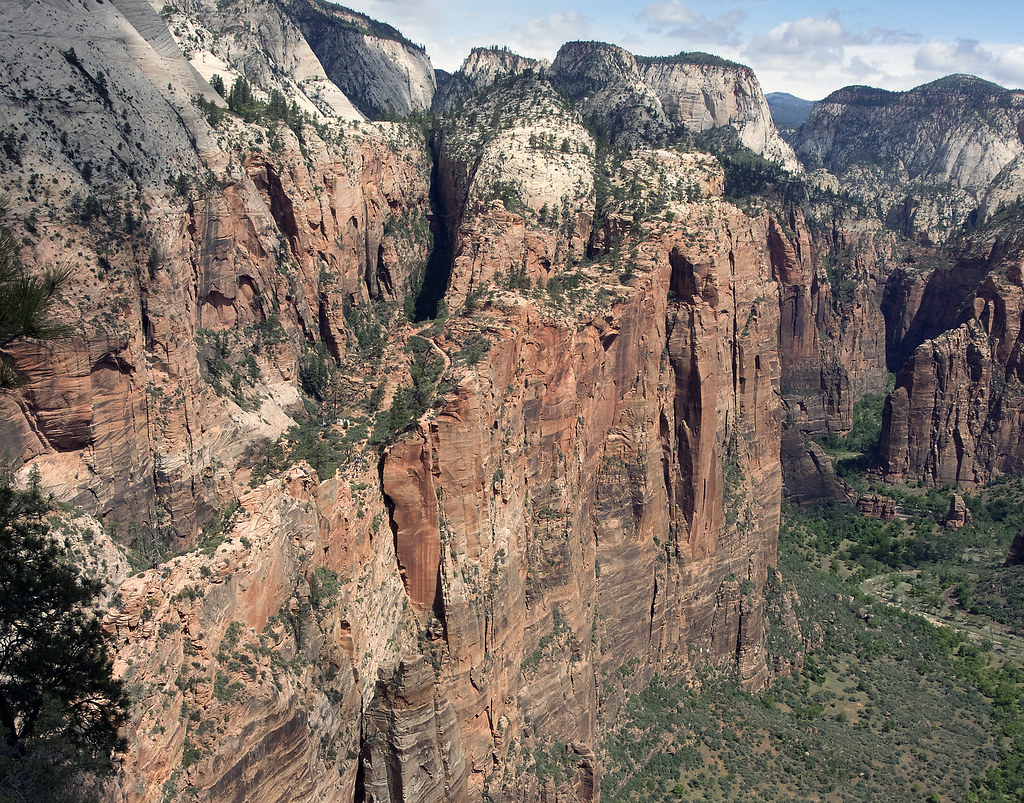
2. If You’re a Winner – Hike Angel’s Landing
- Shuttle Stop: 6 • The Grotto
- Distance: 1.2 miles from Scout Lookout (5.4 miles total round trip)
- Elevation: 488 feet (1488 total)
- Difficulty: Hard
Congratulations on winning the lottery! You’re going to LOVE the next part (unless you’re scared of heights, then you will really really HATE it).
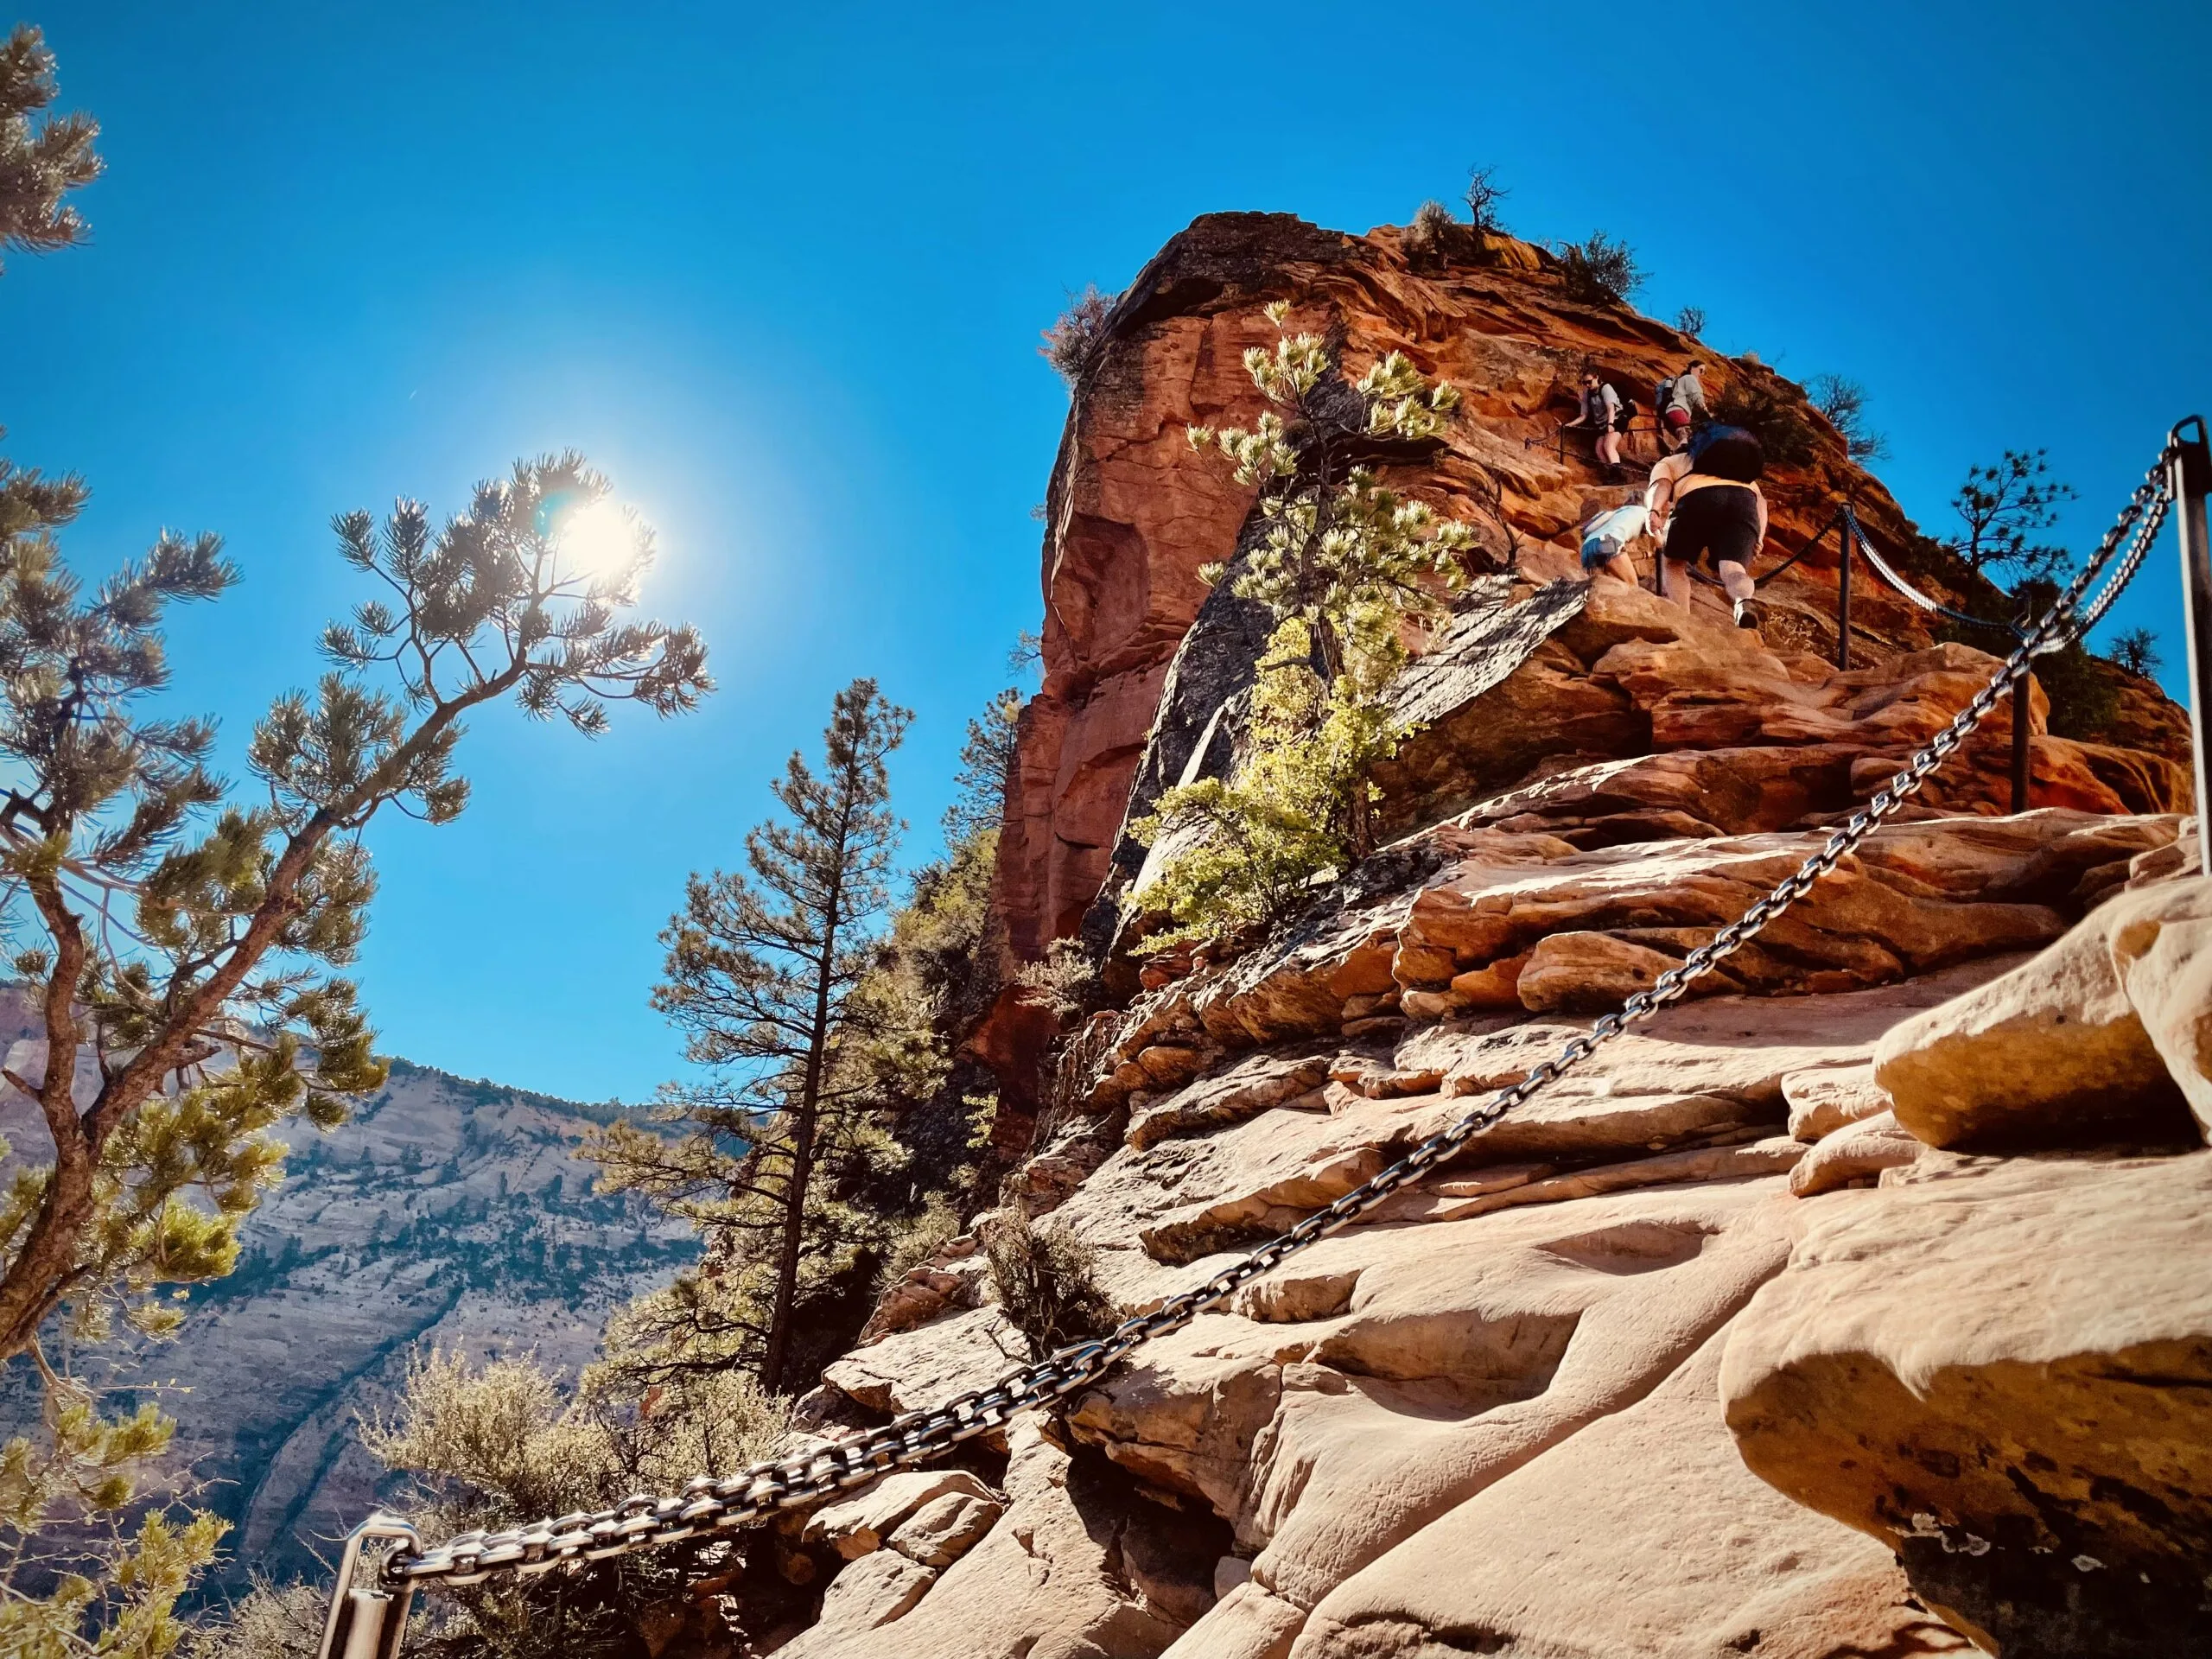
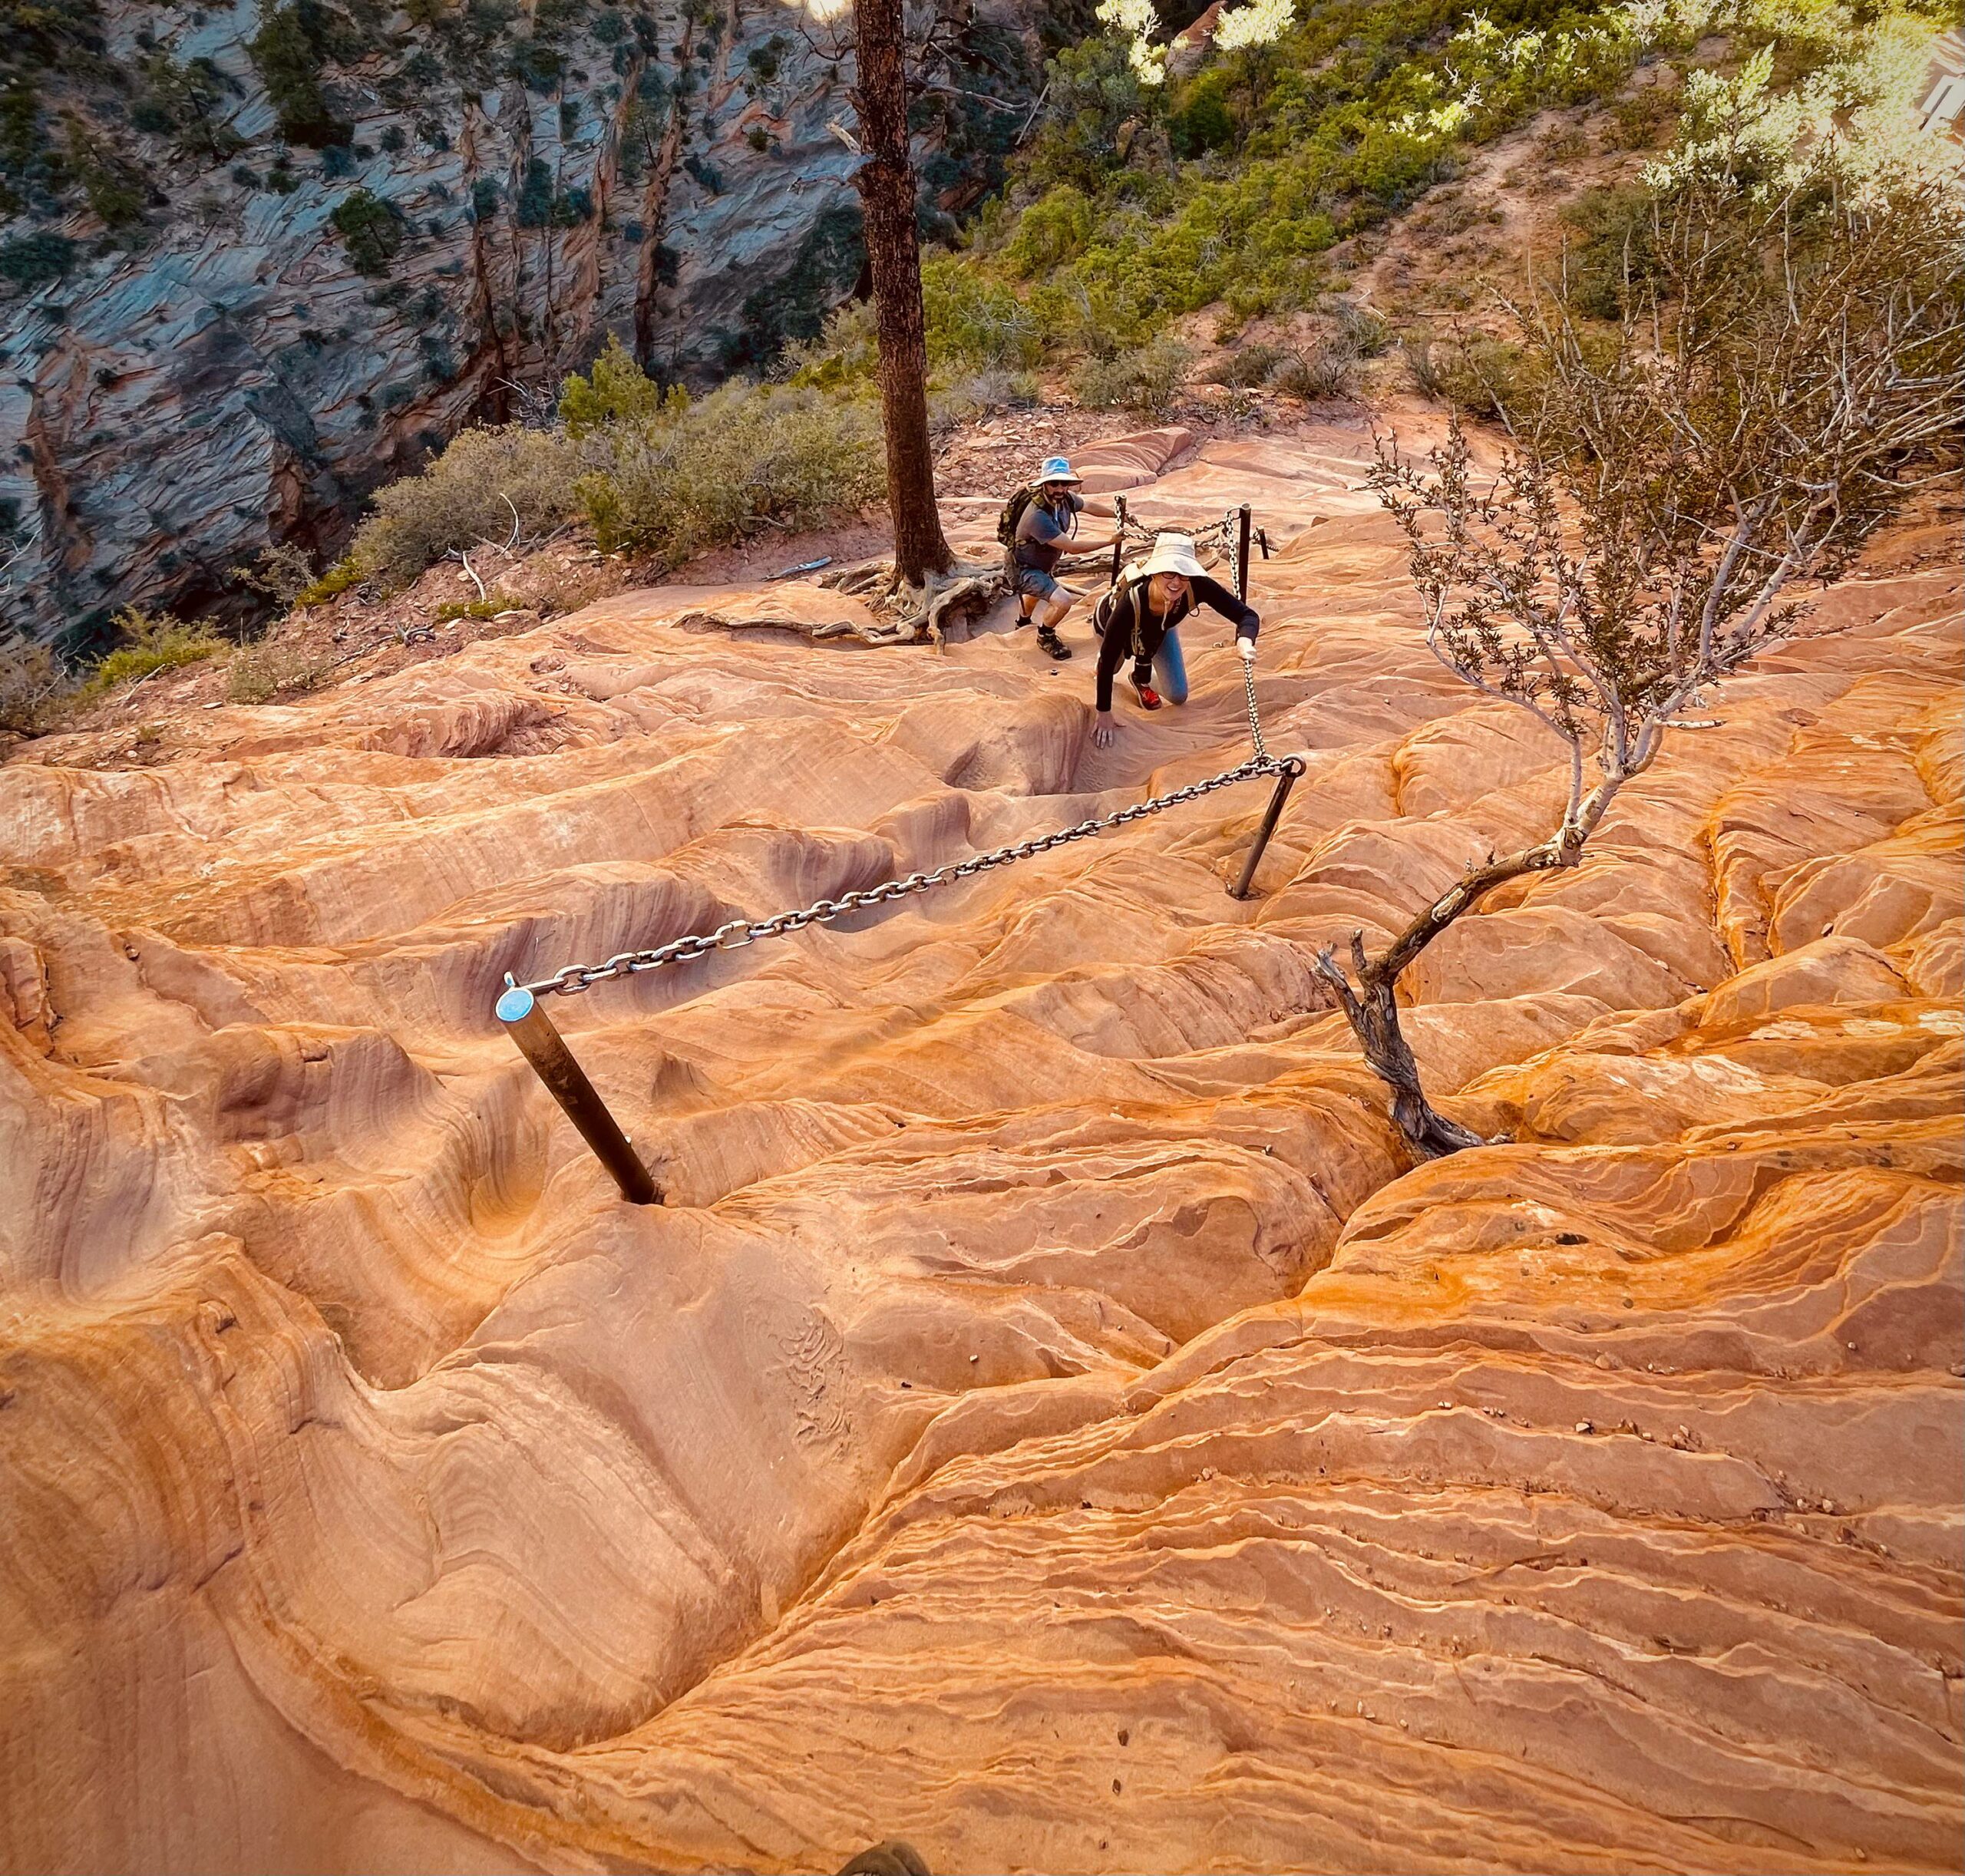
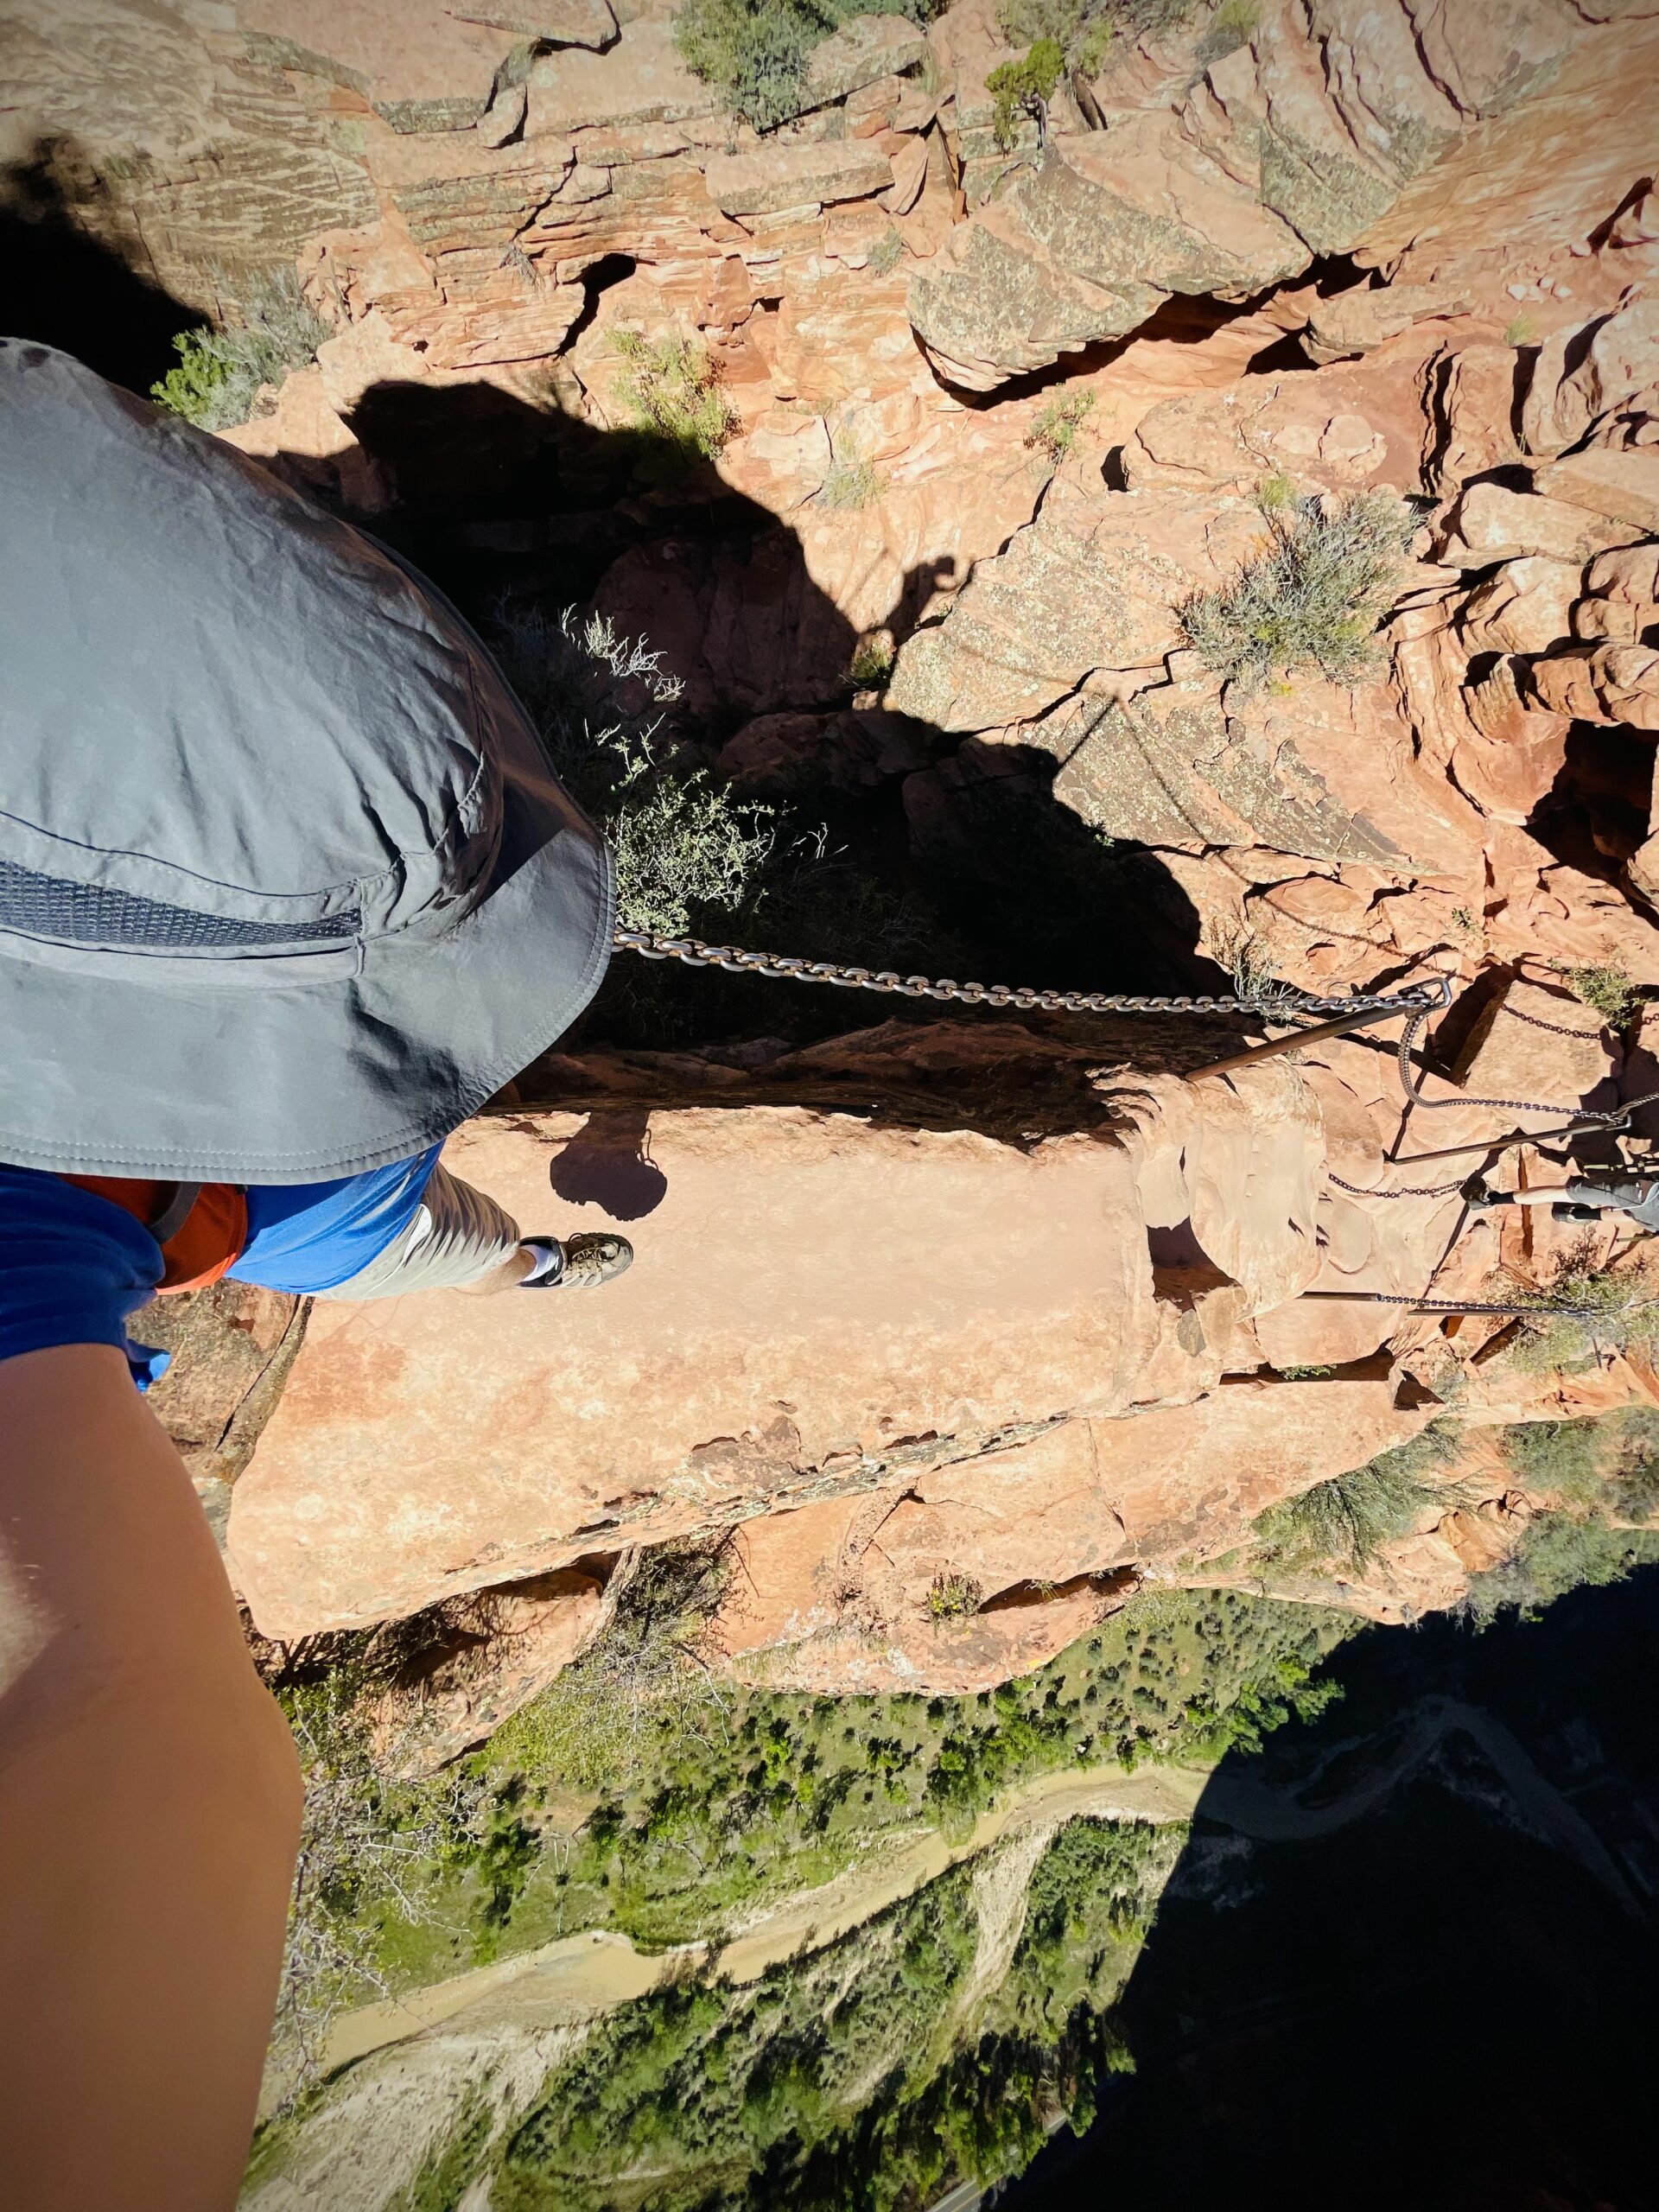
After another ticket check from the Rangers your are on to the official Angels Landing Hike. You’ll immediately find a series of chains aiding your journey as you scale up the rocks one at a time.
After a quarter mile of chain work, you’ll find a small sitting place that is your last good stopping spot before you get to the much talked about “spine” of Angels Landing.
At its slimmest, the spine of Angels Landing measures a mere twenty four inches wide with perilous thousand foot drop-offs on either side of you. Fortunately, there is a chain to hold on to and you’ll see many hikers with a white knuckle grip on it.

Once you’ve passed that there are still many more chains that will take you up the steep face of the cliff. Even with the lottery system dwindling the number of hikers, you’ll have to be patient, waiting as groups go each way holding the chain up the steep incline.
There are a couple of tougher spots to climb that require a little bit of scrambling, but those are few and far between. Most of it is just good hard leg work and using the chains.
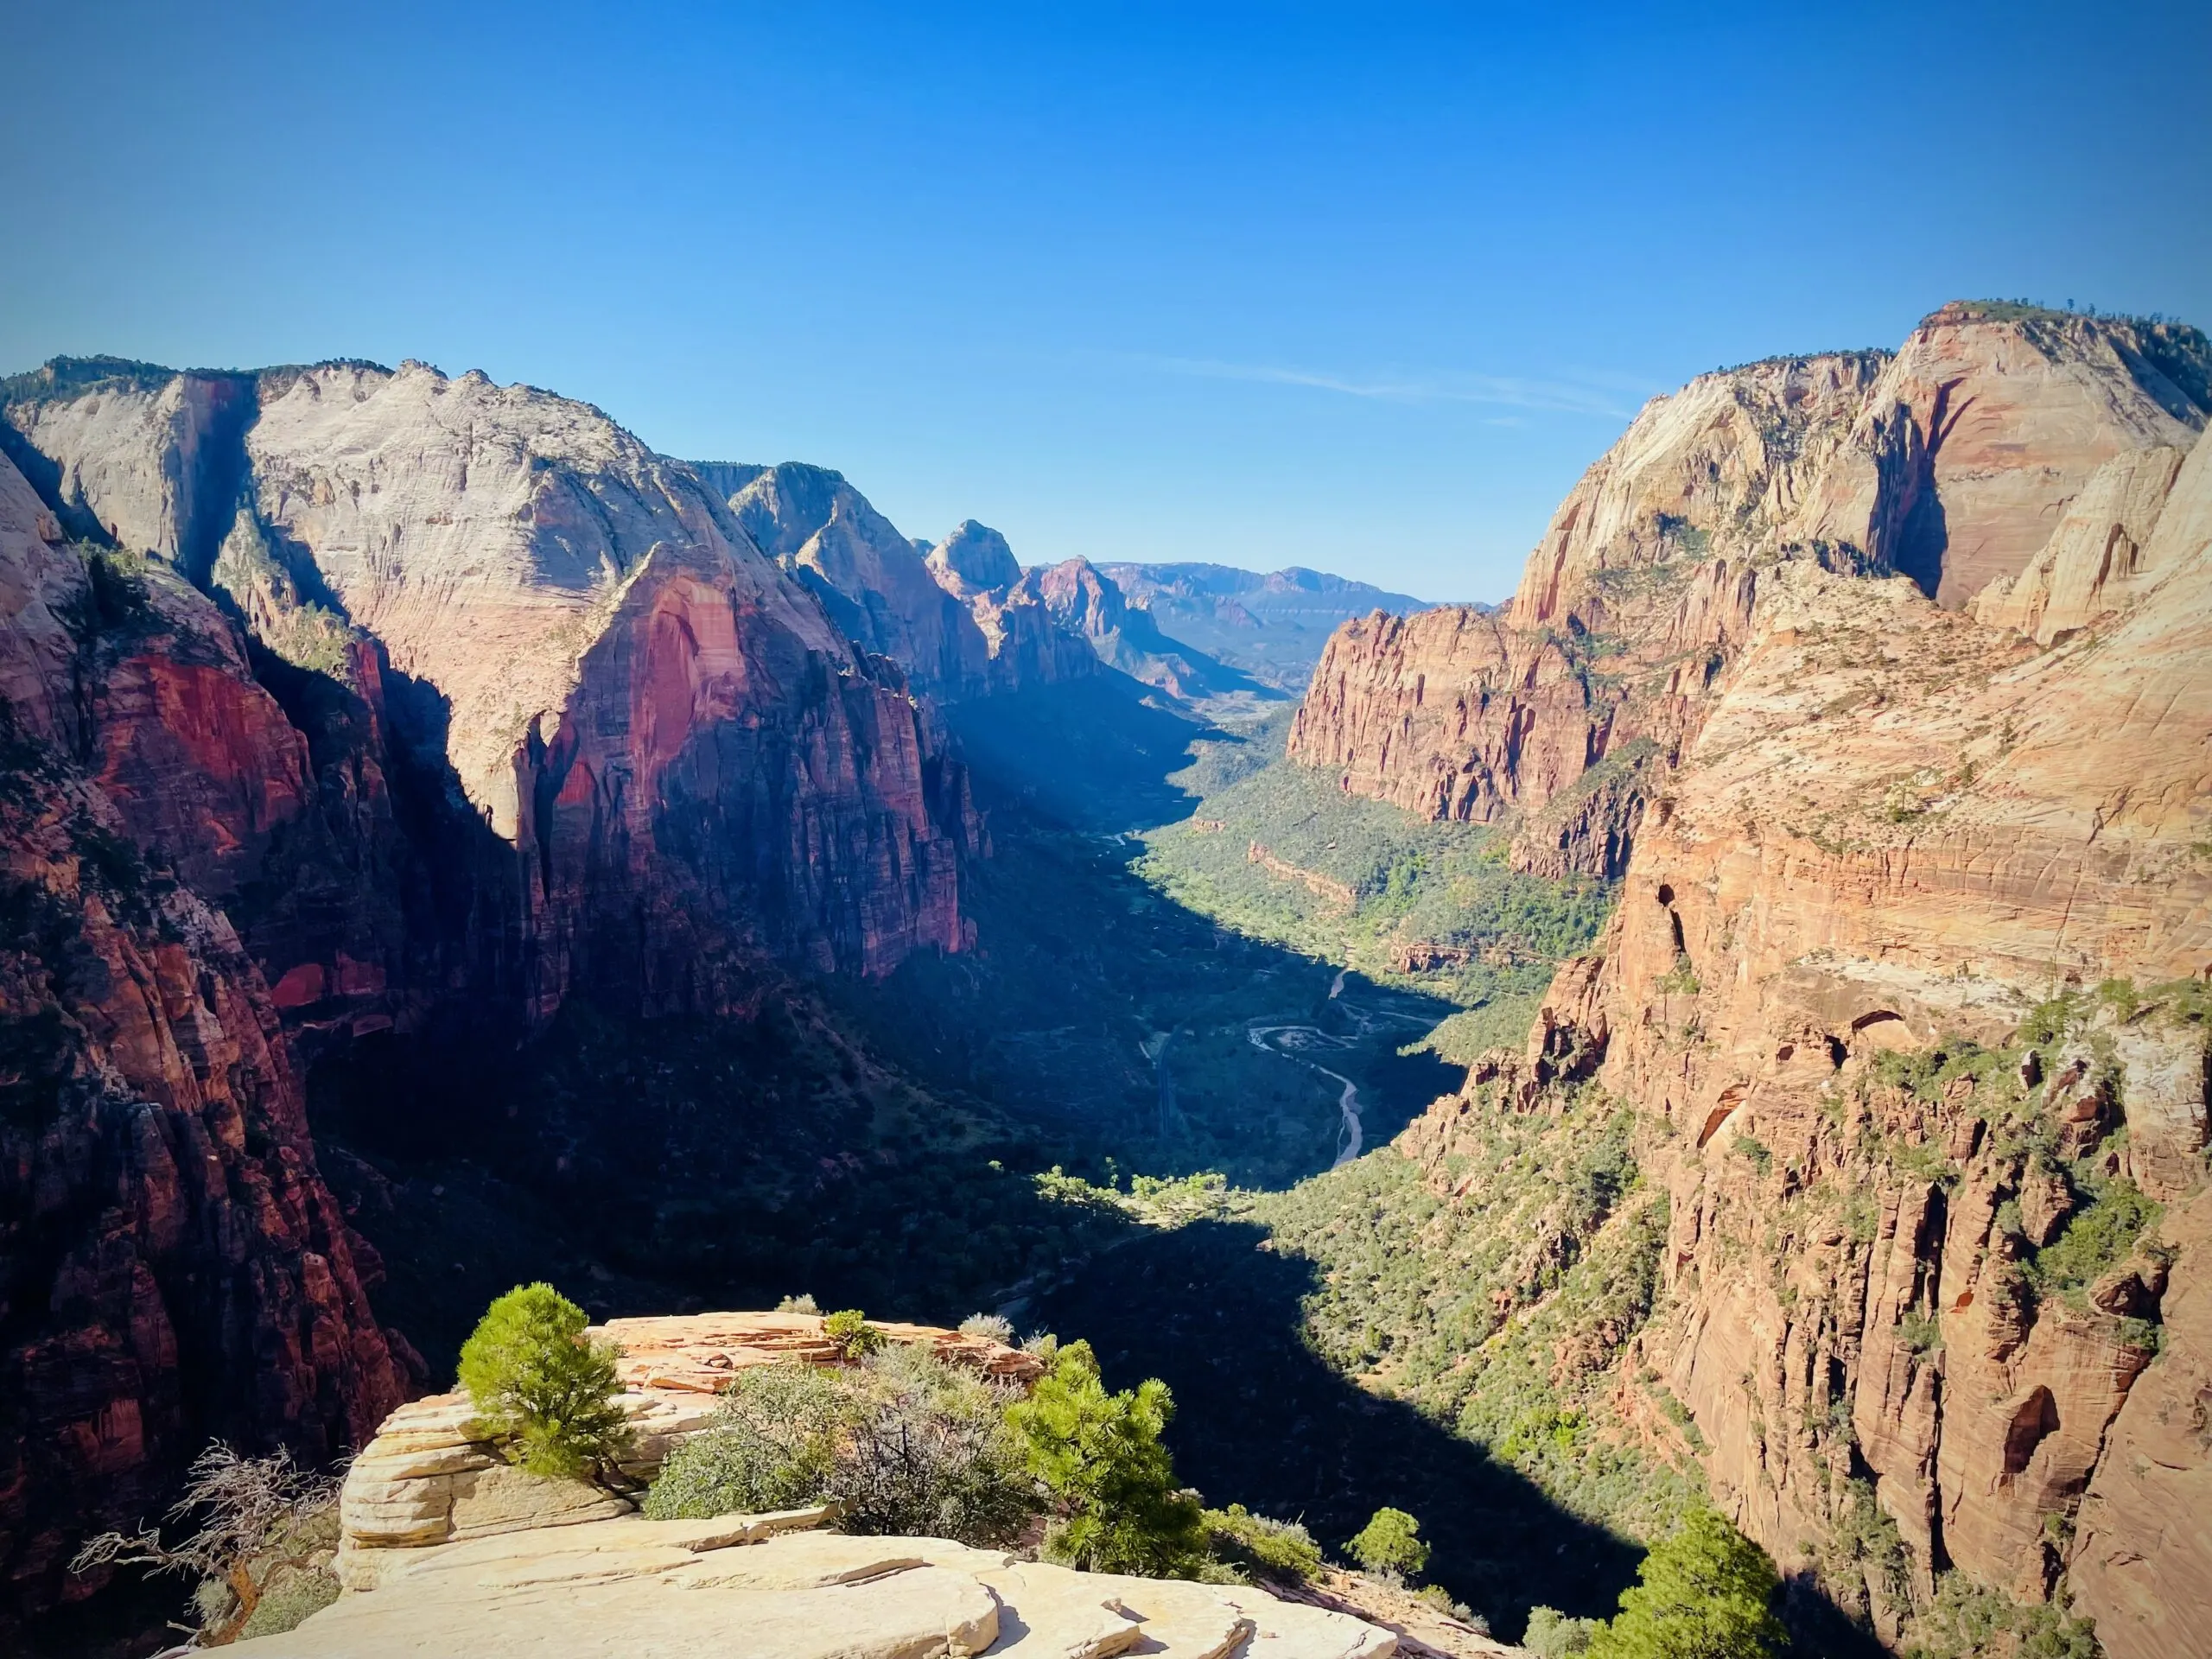
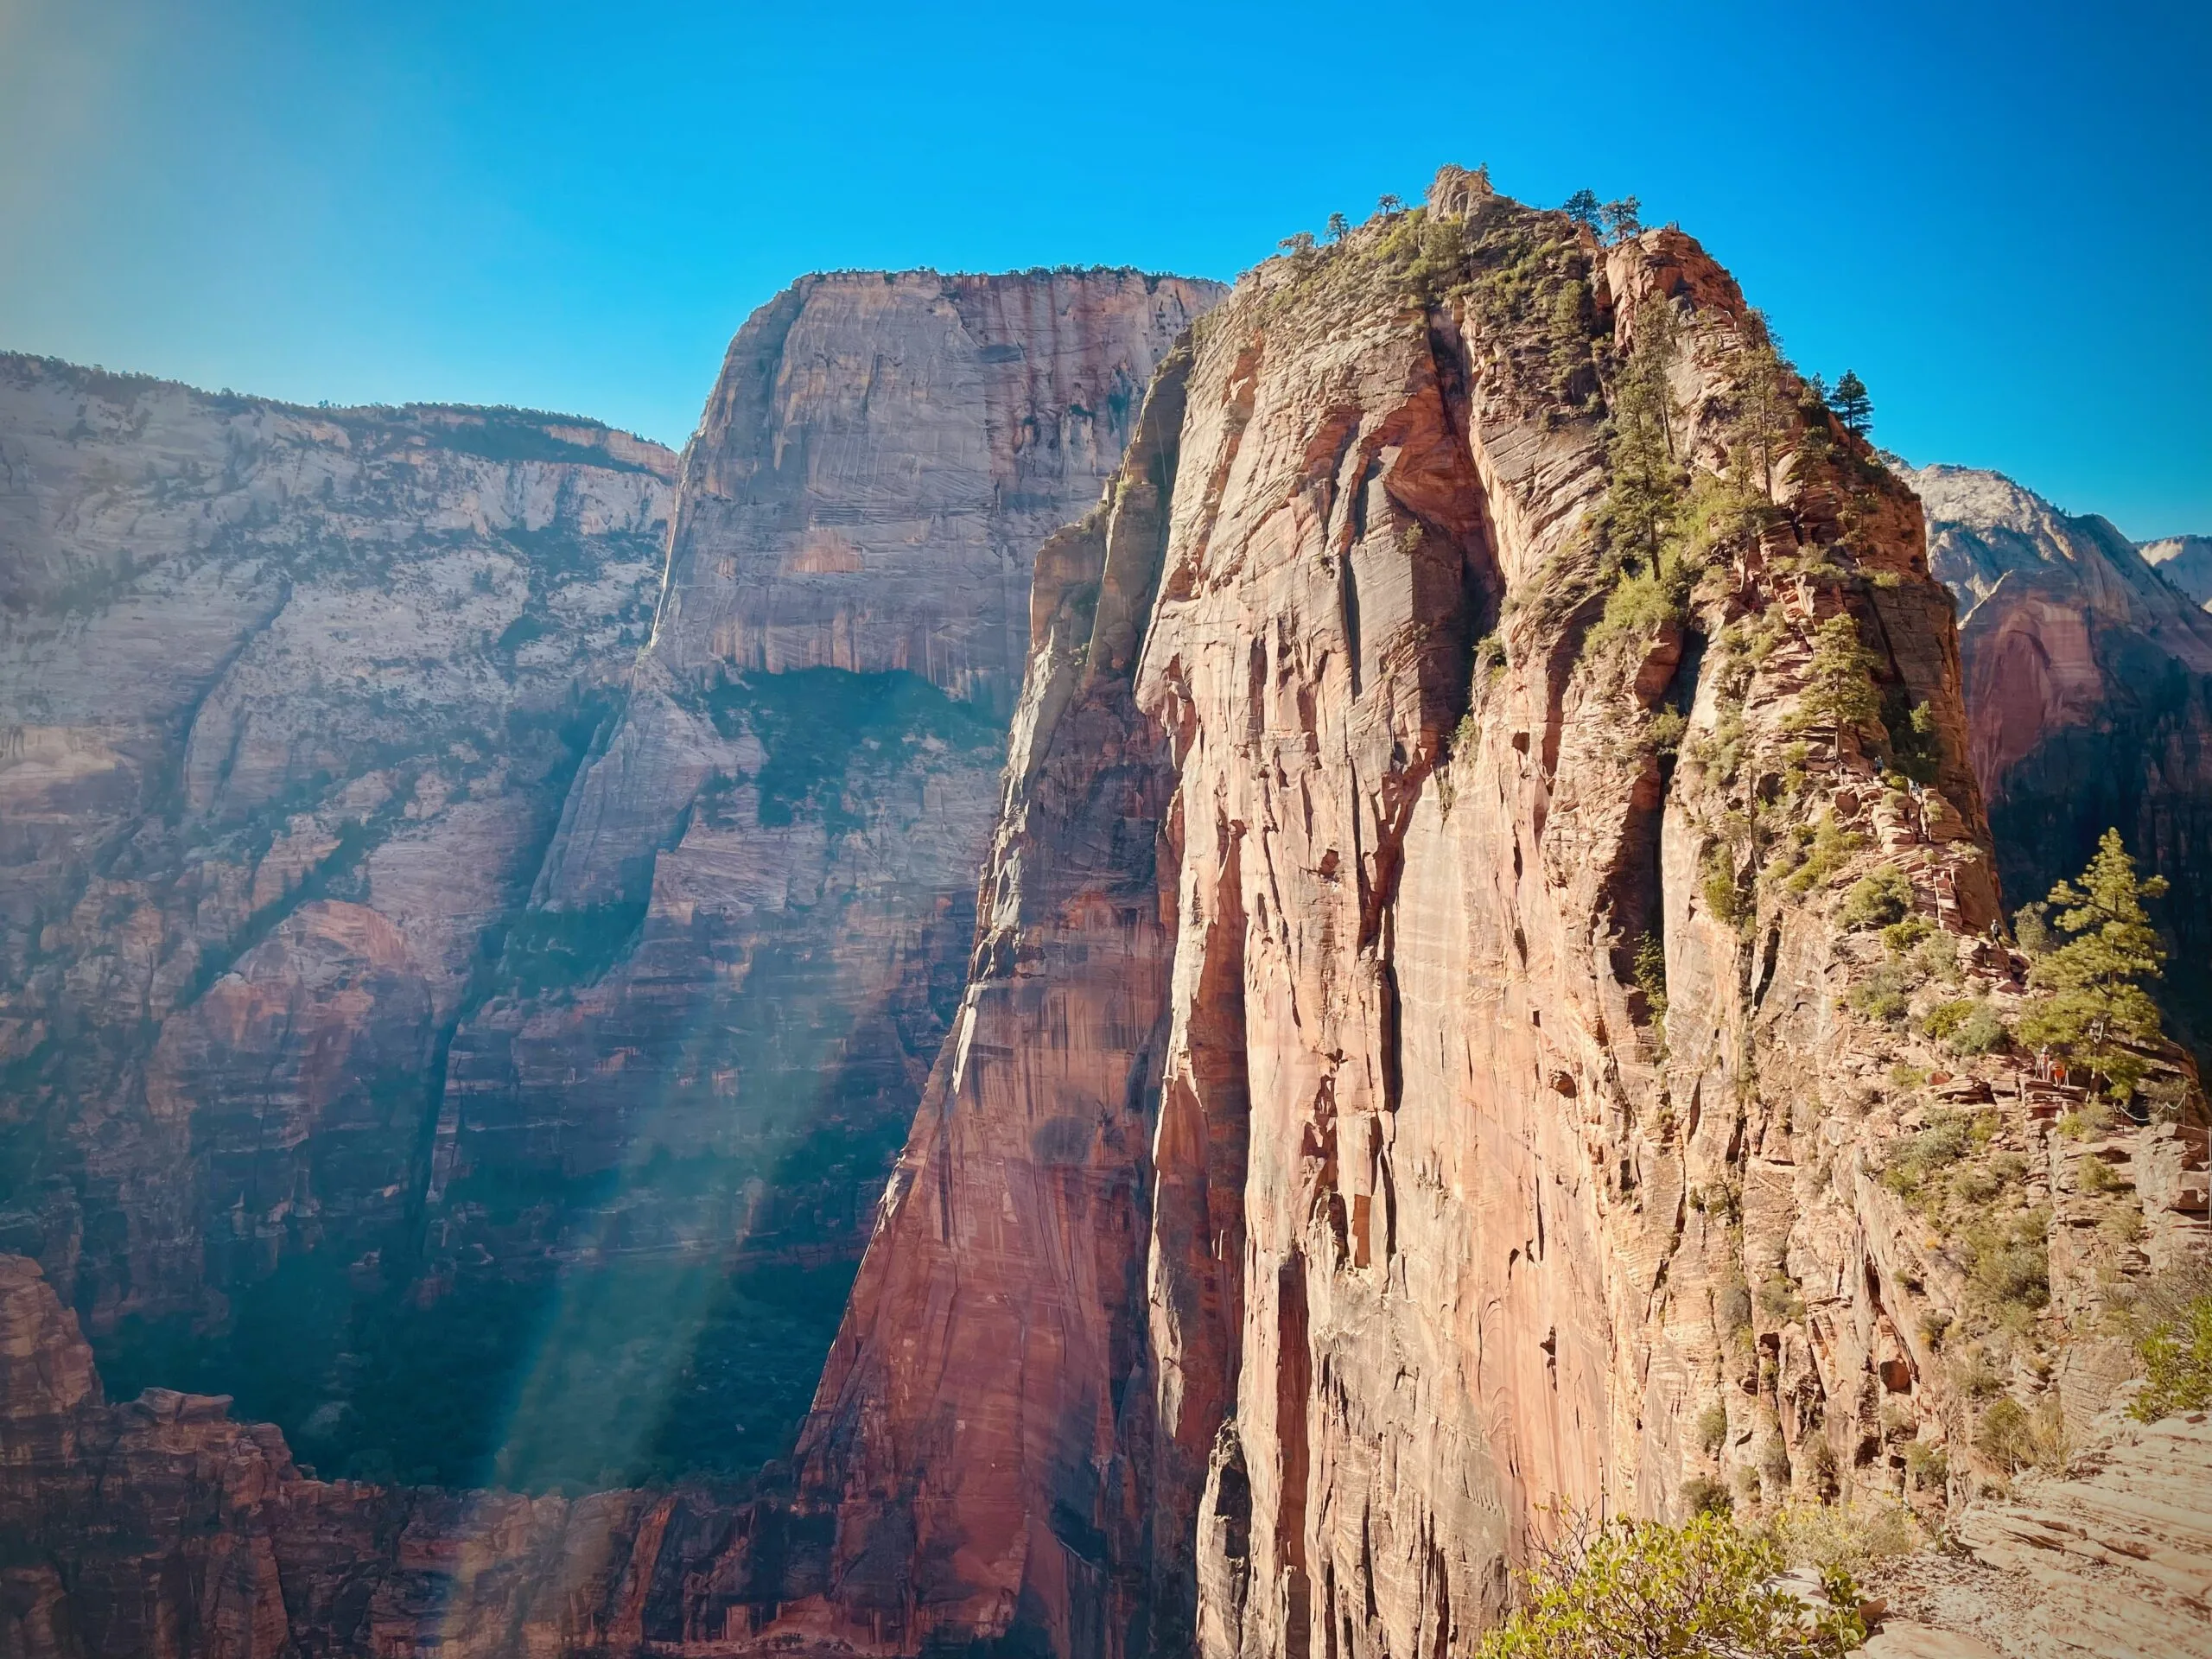
Your reward for the summit is an unparalleled panoramic of the Zion Valley, stretching from the Narrows all the way out to Springdale.
There is plenty of space on the top to find your own spot, snap a few photos, and soak in everything you’ve accomplished before you begin the long and winding road back from whence you came.

3. Lower Emerald Pools Trail
- Shuttle Stop: 5 • Zion Lodge
- Distance: 2.2 miles
- Elevation: 150 feet
- Difficulty: Easy
If you are wonder what to do at Zion National Park to end your second day, this is a great hike,
Plus, after managing the difficulty of Angel’s Landing, it’s nice to have an easy hike where you can still catch some amazing scenery. The Emerald Falls Trails offers you a trio of options to hike; Lower, Middle, and Upper Emerald Falls.
The Lower Emerald Pools Trail, the easiest of the three, is paved and gives you the same Emerald Pools experience without as much effort.
I always find it magical to see a waterfall from the other side and the Lower Pools trail gives you that opportunity, as it concludes by winding behind the waterfall that pours into the Emerald Pools below.
Do be careful when you’re near the waterfall because water can blow onto the trail and make it quite slippery. If you have enjoyed the Emerald Falls Lower trail and are up for more, you’ll notice a set of stairs past the waterfall.
This will take you to a sign pointing you to the Middle Emerald Pools Trail .1 miles away and Upper Emerald Pool Trails .4 miles away.

4 BEST PLACES TO STAY IN ZION NATIONAL PARK
Since Springdale is built around Zion tourism, there are a wide range choices for lodging, depending on your budget.
Aside from Springdale, one of the most popular places to stay near Zion is the town of St George which has tonnes of hotels to choose from. It is a 30 minute drive from St George to Zion so you’ll have a bit of a commute.
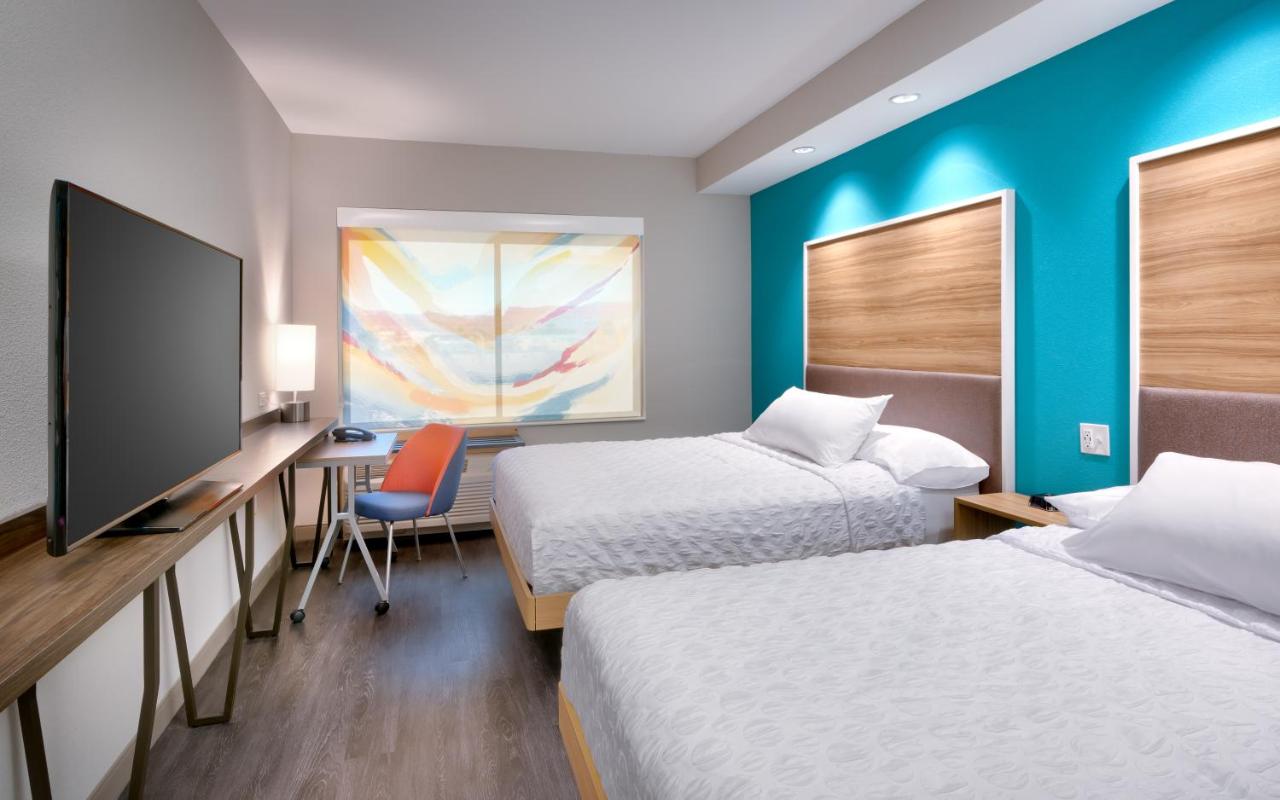

Tru By Hilton St. George
Here are a few of our favorites:
Watchman and South Campground
If you are lucky enough to grab a highly coveted spot at Watchmen or South Campground, staying in Zion gets you off to a great start. If you want to complete Zion National Park in 2 days you’ll ideally want to stay as close as possible as this is it!
Placed right next to the Zion Visitor Center, you’ll only have a couple of hundred yards to make it to the shuttle and you don’t have to worry about the dreaded parking situation. Watchman can be reserved up to six months ahead of time and south can be booked two weeks in advance.
You can book your stay and find more information here.

Zion Lodge
If staying in Zion peaks your interest, but camping does not, then the Zion Lodge is a perfect choice. Located near the Emerald Falls Trails, the Zion Lodge has cabins, normal hotel rooms and high end suites available.
The Zion Lodge offers dining, wifi, horseback riding tours and, best of all, a prime seat to watch the sun slowly set across the mountains.
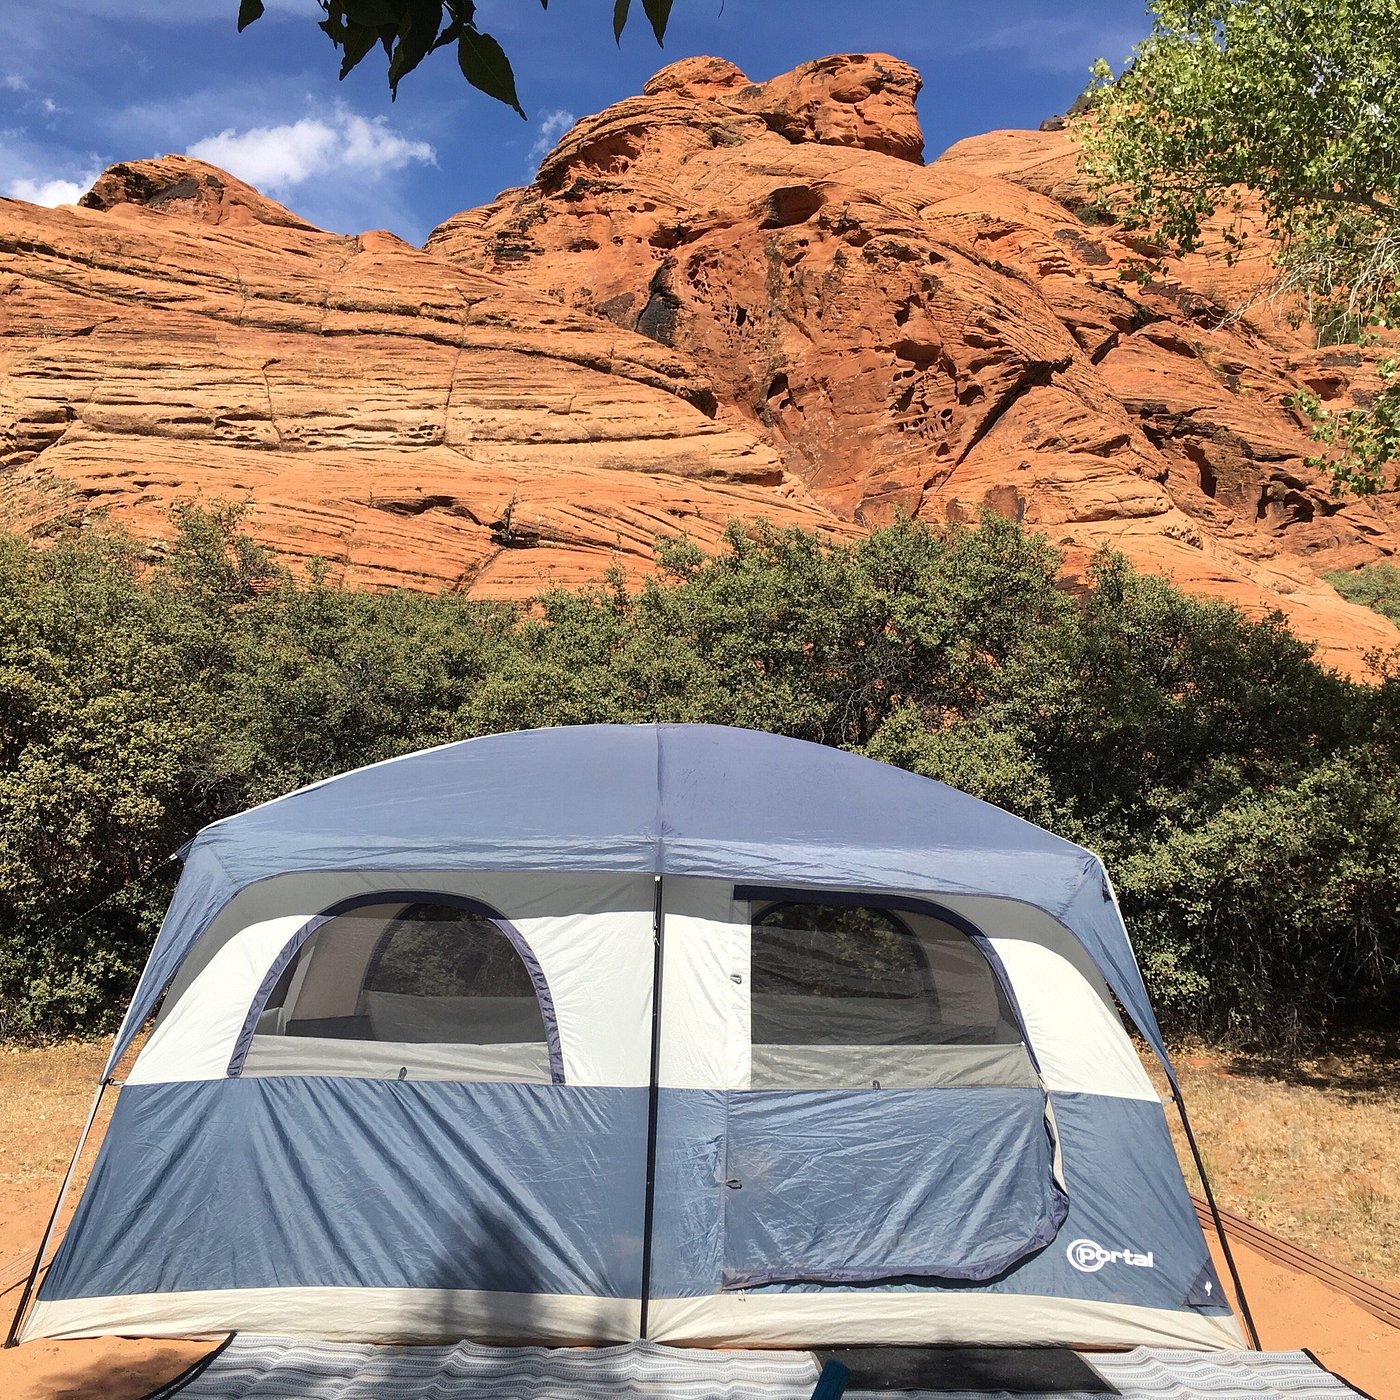
BLM Land
For those who are more adventurous, or more frugal, the Bureau of Land Management has many options surrounding Zion. Sites such as Gooseberry Mesa, Kolob Reservoir, Hurricane Cliffs, and Sheep Bridge Road offer places to stay for free, or a nominal fee.
For that low cost there is a trade off; most have no running water, no electricity, and few bathrooms. Still, if you want a place to stay on the cheap, there is nothing cheaper than free.
Hotel Zion Inn
Being a tourist town, hotels in Springdale are not cheap. You’ll be lucky to find anything that doesn’t surpass $200 per night, and that’s if you book well in advance.
However, if you are willing to drive thirty minutes to La Verkin, Hotel Zion Inn has prices that are often a third to a quarter of their Springdale counterparts.
A bare bones stay, the Hotel Zion Inn is clean and, as a bonus, offers breakfast for travelers hoping to get an early start on their days.
4 BEST PLACES TO EAT NEAR ZION NATIONAL PARK
1. Oscar’s Cafe – Oscar’s is a place that defines eclectic. From Philly cheesesteaks and ribs, to burritos and pastrami with sauerkraut, Oscar’s has something for the whole family. Make sure not to miss their made fresh desserts options the Volcano Brownie Sundaes and Kathy’s Famous Carrot Cake.
2. MeMe’s Cafe – Meme’s has two distinct menu options; hearty sandwiches and fancy crepes. You can never go wrong with a MeMe’s Hawaiian Sandwich which has slow roasted pork, grilled pineapple slice, teriyaki sauce & cheddar. On the crepe side you can go savory with choices such as veggie delight and BBQ or you can indulge your sweet tooth with options like cinnamon sugar or very berry.
3. Zion Pizza – Any opportunity for great pizza is an opportunity you should take and Zion Pizza fits that bill. Zion’s Pizza encourages you to stay away from the appropriately named Boring Pizza, which is plain old cheese, and instead take a shot at some of their more unique creations; Hot & Spicy Southwestern Burrito Pizza, White Sun Pizza, or Thai Chicken Pizza.
4. Peruvian Flavors – If you end up in the nearby town of Hurricane, this restaurant is my favorite by a mile. Run by native Peruvians, what this small restaurant lacks in style, it more than makes up for in mouthwatering dishes that will delight your taste buds. This is the most authentic Peruvian place I’ve eaten at outside of Peru. Must try items are the arepas, empanadas, and the ceviche. Oh, and don’t forget the chicha morada, Peru’s addictive purple corn drink (yes you heard me right).
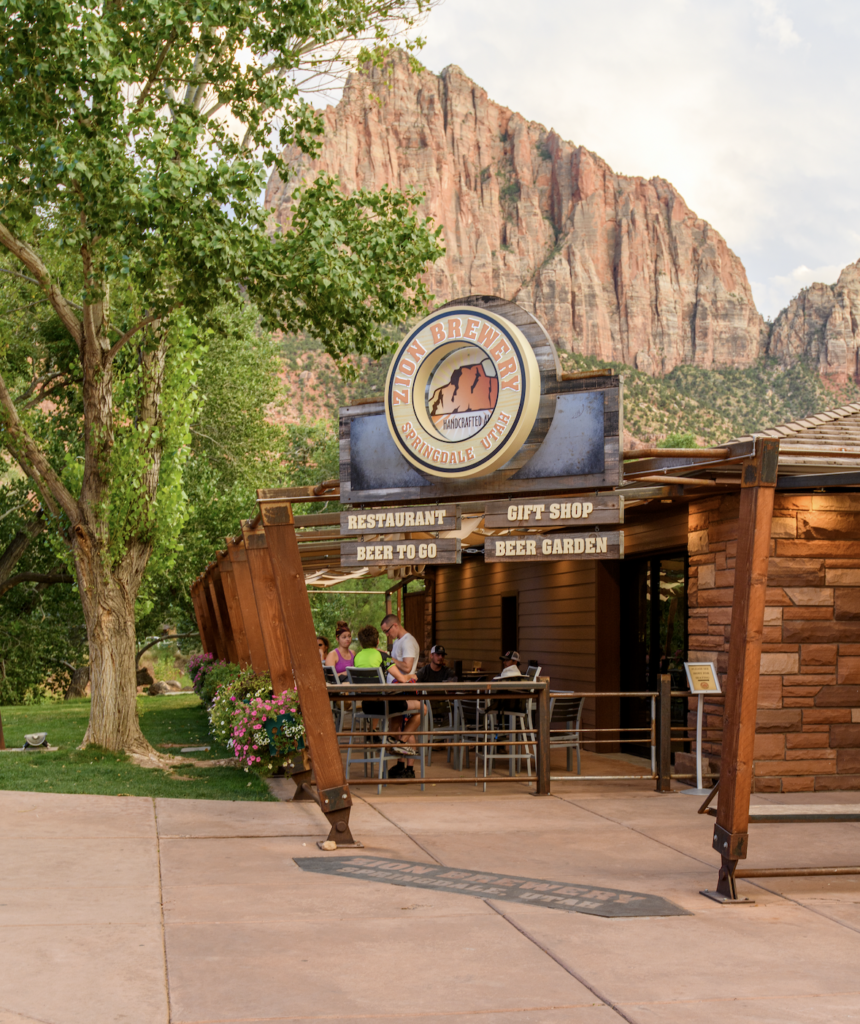
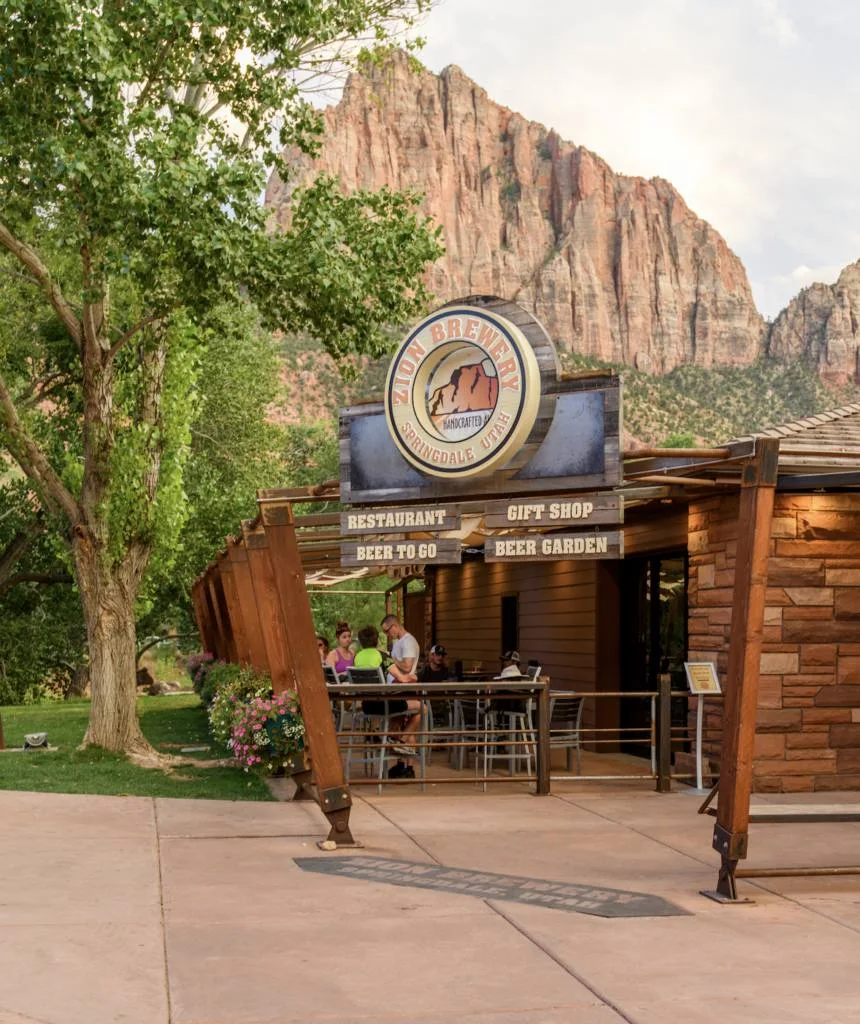
5. Zion Canyon Brewery is the preferred local beer spot, with burgers and pub fare to pair with an ice-cold draft.
**Remember to check that the restaurant you are interested in is open. The days and times of many restaurants change based on the season.
READY FOR MORE UTAH NATIONAL PARKS?
If you enjoyed Zion and have a few more days available on your vacation, Utah has a myriad of spectacular parks with bucket list adventures you can add to your itinerary.
Here are four quick recommendations: Bryce Canyon National Park is only two hours away from Springdale and is a natural choice for an add on day or two in your Utah road trip.
For further outdoor adventures consider heading on to Arches National Park, Grand Staircase-Escalante National Monument, and Canyonlands National Park.
If you have a 2 day Zion itinerary that you prefer, we are always open for suggestions, let us know in the comments below!